
Contents
- Introduction
- What is Microsoft Attack Simulator?
- Prerequisites
- Support and Resources
- Objective
- How to Access the Portal
- Setting Up Your First Campaign
- How to Access Campaign Reporting
- Resources and Next Steps
Introduction
In a world where cyber threats are increasingly sophisticated and pervasive, protecting your organisation from phishing attacks is paramount. Microsoft Attack Simulator provides organisations with a security awareness training capability, enabling businesses to proactively test and strengthen their defences against these deceptive threats.
What exactly is Microsoft Attack Simulator, and how does it enhance your organisation’s security posture?
This blog will dive into the key features and benefits of Microsoft Attack Simulator, demonstrating how it can be an essential component in your cybersecurity toolkit.
By simulating real-world phishing scenarios, you can identify vulnerabilities, educate your employees, and implement security measures to safeguard your digital assets.
What is Microsoft Attack Simulator?
Now that we’ve laid the foundation and understanding of Microsoft Attack Simulator, it’s time to take the next step in our journey.
In our upcoming blog post, “Attack Simulator: Your First Campaign” we will guide you through the practical steps of accessing the Attack Simulator portal, configuring your first simulation, and leveraging the metrics and statistics to fortify your organisation’s security posture.
Stay tuned for this exciting instalment as we dive into the hands-on aspect of Microsoft Attack Simulator. Subscribe to our updates, and let’s continue our exploration of this cutting-edge security solution!
Prerequisites
- Licensing Requirements: Attack simulation training requires a Microsoft 365 E5 or Microsoft Defender for Office 365 Plan 2 license.
- Entra ID Permissions: To configure Microsoft Attack Simulator effectively, adequate permissions within Entra ID are essential. There are two roles available for Attack Simulator, you must be assigned the ‘Attack Simulation Administrator’ role for full access and functionality:
- Attack Simulation Administrator: Create and manage all aspects of attack simulation creation, launch and scheduling of a simulation, and the review of simulation results. Members of this role have this access for all simulations in the organisation.
- Attack Payload Author: Create attack payloads, but not launch or schedule them. Attack payloads are then available to all administrators who have permission to create an attack simulation.
Alternatively, If you hold the role of Global Administrator or Security Administrator, you have the necessary permissions to access the entire platform.
Support and Resources
In addition to the key resources already mentioned, there are several other avenues where users can find comprehensive support and valuable information regarding Microsoft Attack Simulator.
These resources are essential for both beginners and experienced users looking to enhance their understanding and usage of the tool. Here’s a detailed overview:
Microsoft Attack Simulator Documentation: The Microsoft Attack Simulator documentation on Microsoft Learn is the primary source for official information. It covers everything from basic setup and configuration to advanced features. This documentation is regularly updated and includes tutorials, quickstart guides, and detailed articles on specific functionalities.
Microsoft Defender for Office 365 Community Hub: The Microsoft Defender for Office 365 Community Hub is a valuable resource for engaging with other Defender users and experts. Here, you can participate in discussions, ask questions, and share insights. The community is a great place to learn from real-world experiences and stay updated on best practices and new features.
Microsoft Defender for Office 365 Blog: The Microsoft Defender for Office 365 Blog on the Microsoft Community Hub is an excellent resource for staying informed about the latest updates, feature releases, and insights from the Defender team. It’s a platform where you can find in-depth articles, case studies, and announcements directly from Microsoft professionals.
By leveraging these resources, users can effectively enhance their skills, resolve challenges, and make the most out of their Microsoft Attack Simulator experience. Whether you’re looking for self-guided learning, community support, or professional assistance, these resources cover all bases for comprehensive support.
Objective
As the assigned Cyber Security Engineer, your goal is to assess our organisation’s susceptibility to phishing attacks using Microsoft Attack Simulator.
Begin by accessing the Attack Simulator portal.
Conduct a baseline phishing campaign targeting all users within the organisation.
After the campaign concludes, compile the simulation statistics and report your findings to the CISO.
How to Access the Portal
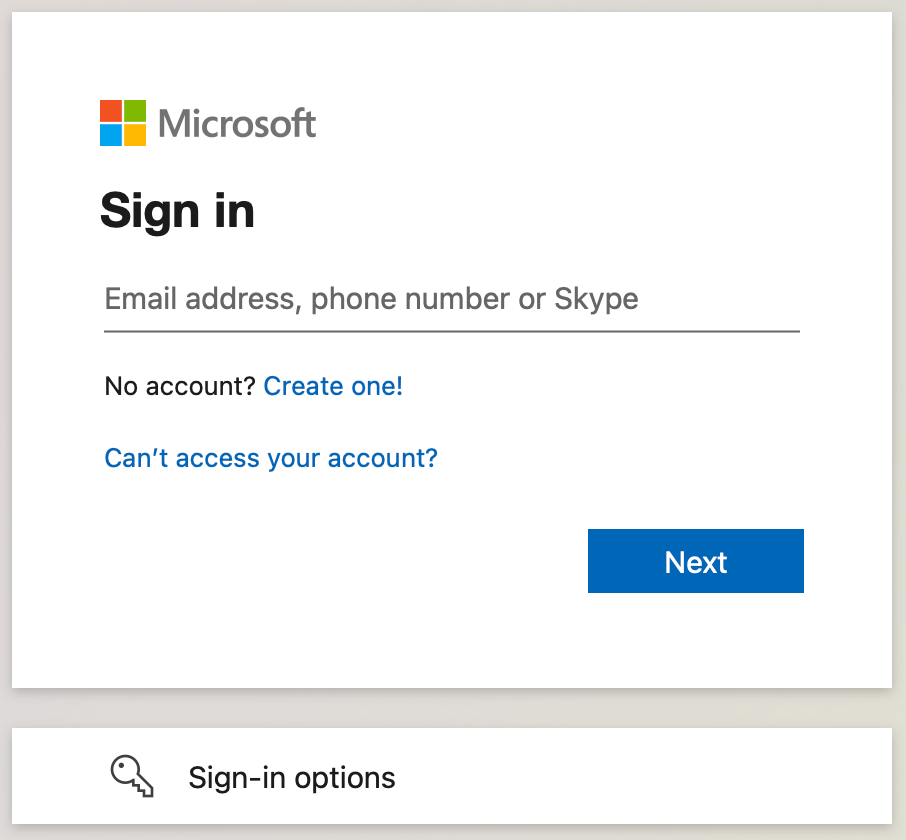
Firstly, you will want to access the Microsoft 365 Administrative Portal at https://admin.microsoft.com, sign in using your administrative credentials:
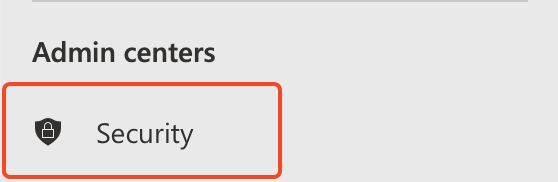
Once you are signed into the portal, you will need to access the ‘Security’ admin portal which is within the left-hand context menu:
Now scroll down to ‘Attack Simulation Training’ which is within the ‘Email & Collaboration’ group heading:

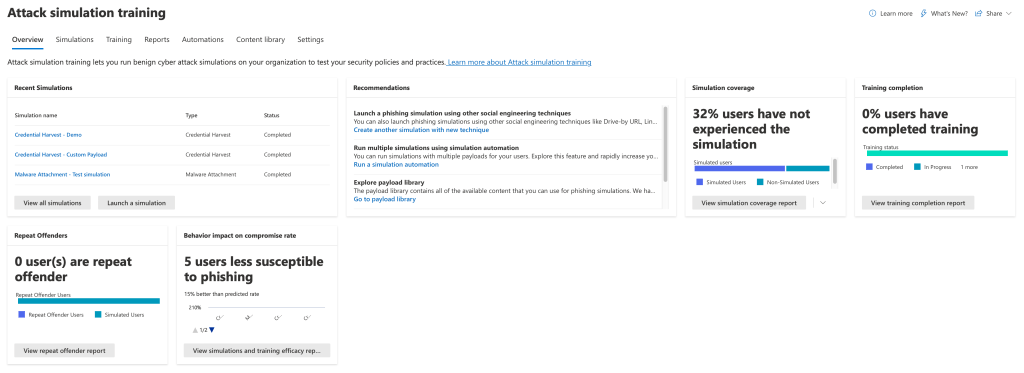
Now you are presented with the ‘Overview’ page of Microsoft Attack Simulator, this page provides insights on existing campaigns and simulations, recommendations for new simulations and training campaigns, and metrics on users who have fallen susceptible to the simulations:
This completes the step ‘How to access the portal’, now you can move onto ‘Setting up your first campaign’ below!
Setting Up Your First Campaign
Now you have successfully got access to the Microsoft Attack Simulator portal, we can begin to prepare our first simulation.
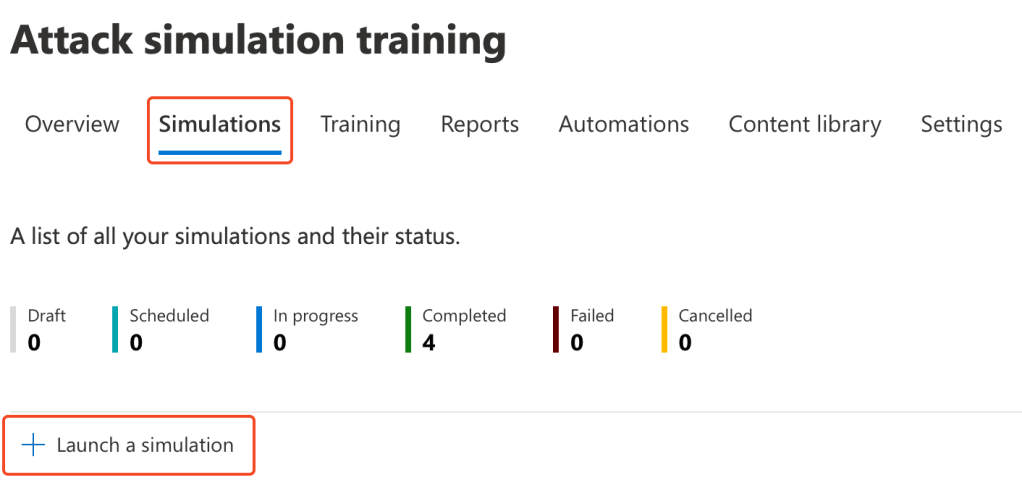
Click into the ‘Simulations’ tab, this presents you with your tenants phishing campaigns along with their current status. To prepare your first phishing simulation, click onto ‘Launch a simulation’:
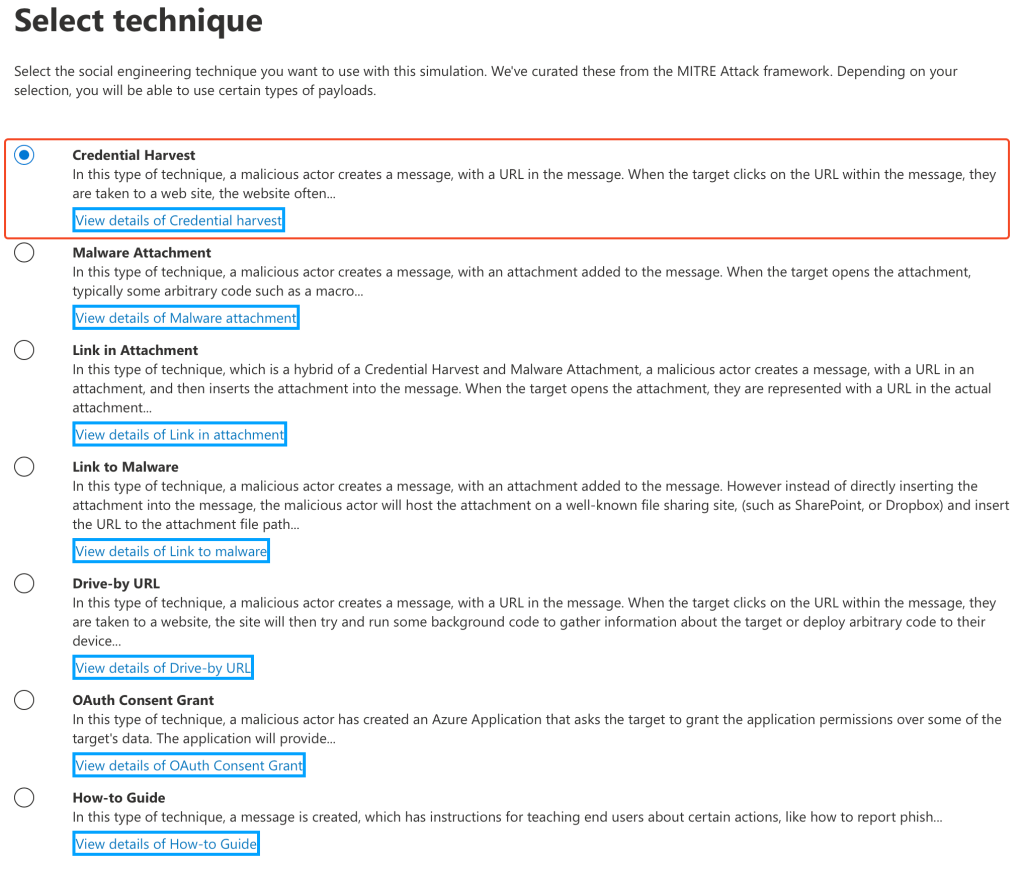
You will then be presented with the technique selection screen. Spend some time to read the description of each technique, as these can be used within different simulations.
We’ll utilise the ‘Credential Harvest’ technique:
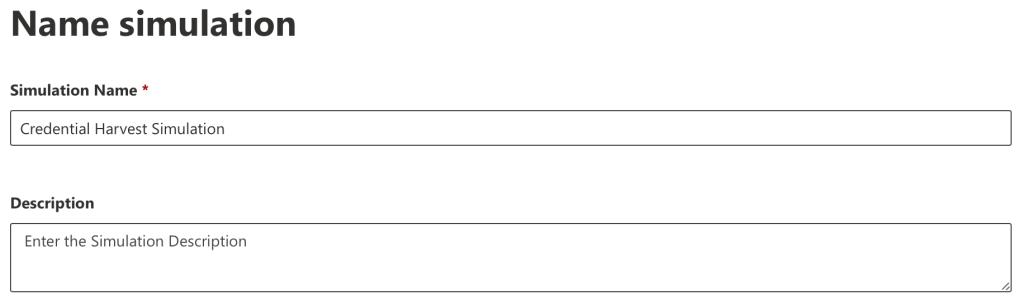
Now enter a name for your simulation. You also have the option of entering a description.
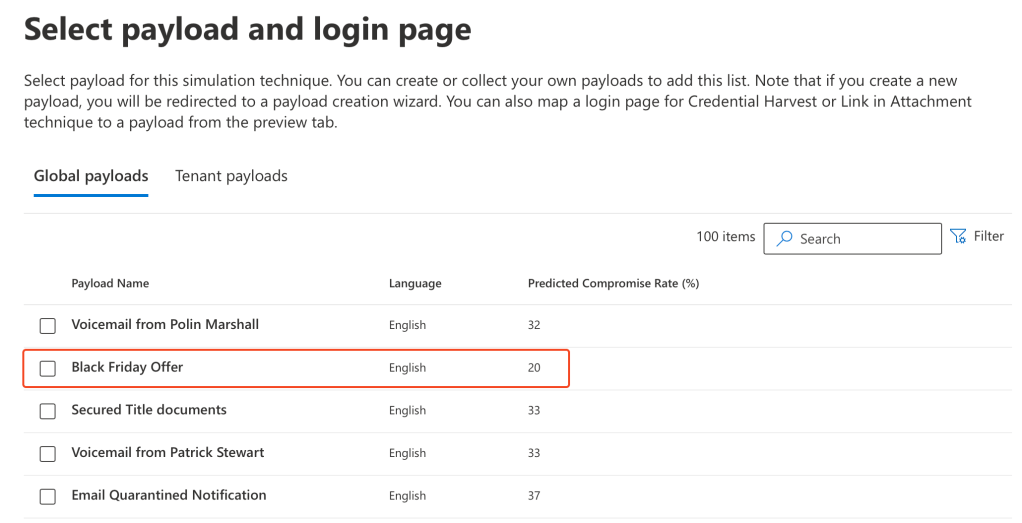
Now you are presented with the payload selection screen, which details the available payloads from the global catalogue. You are also able to access ‘Tenant payloads’ which are custom for your tenant, we’ll look into these in a later blog post.
You can preview each payload by selecting. We are going to utilise ‘Black Friday Offer’:
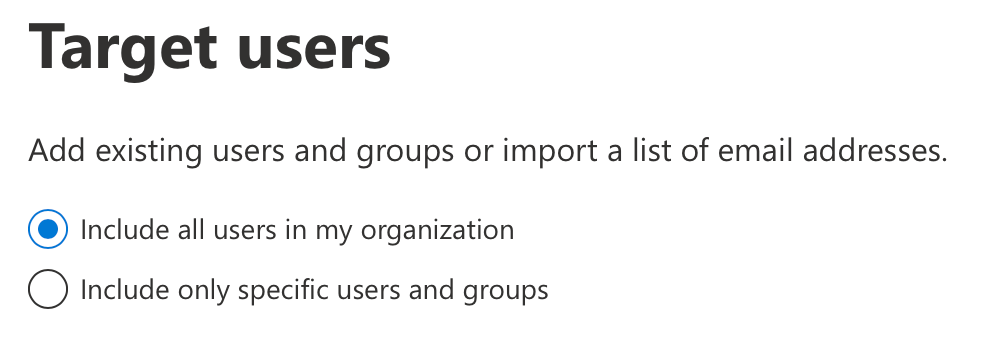
You are now presented with the ‘Target users’ page, which will allow you to specify which users will receive the simulation. You can select all users within your organisation or specify specific users, by manual selection or user properties such as group membership or job title.
I will select ‘Include all users in my organisation’ as per our objective:
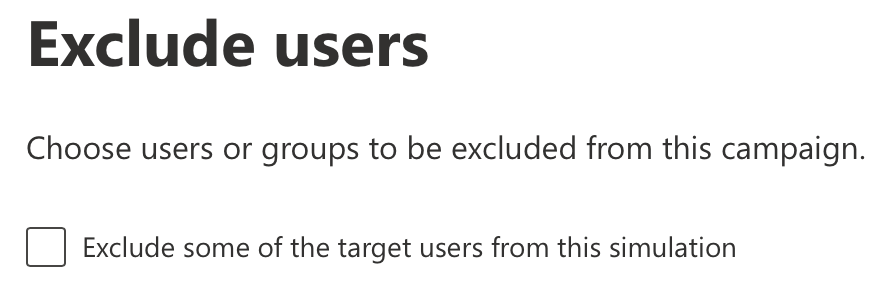
On the next screen you are presented with the ‘Exclude users’ page, which is useful for excluding recipients from the simulation.
I will leave this blank as per our objective, and then hit next:
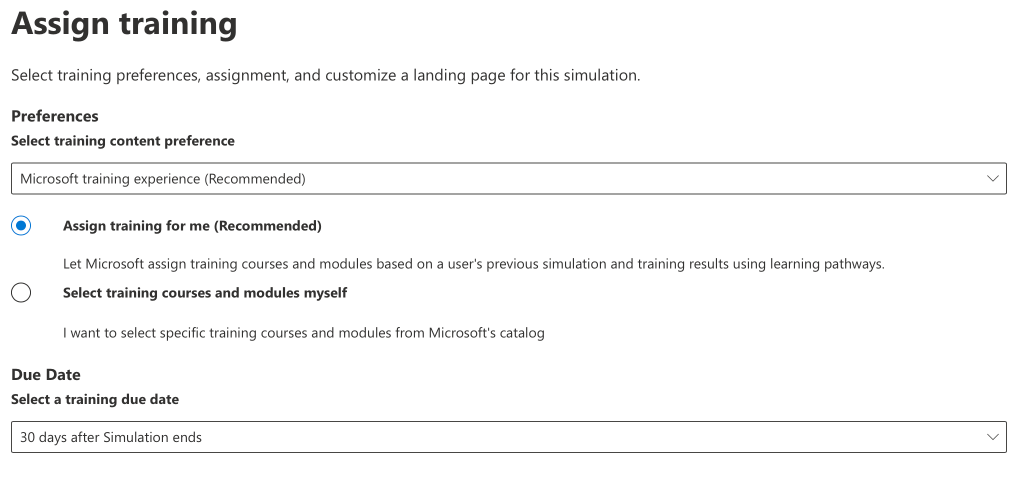
The next screen is the ‘Assign training’ screen. This page is to configure your training for any users who fall a victim to the simulation.
You can either select Microsoft’s library of training resources, or utilise your organisations own training providers, by entering a custom URL to the resource.
We will utilise Microsoft defaults:
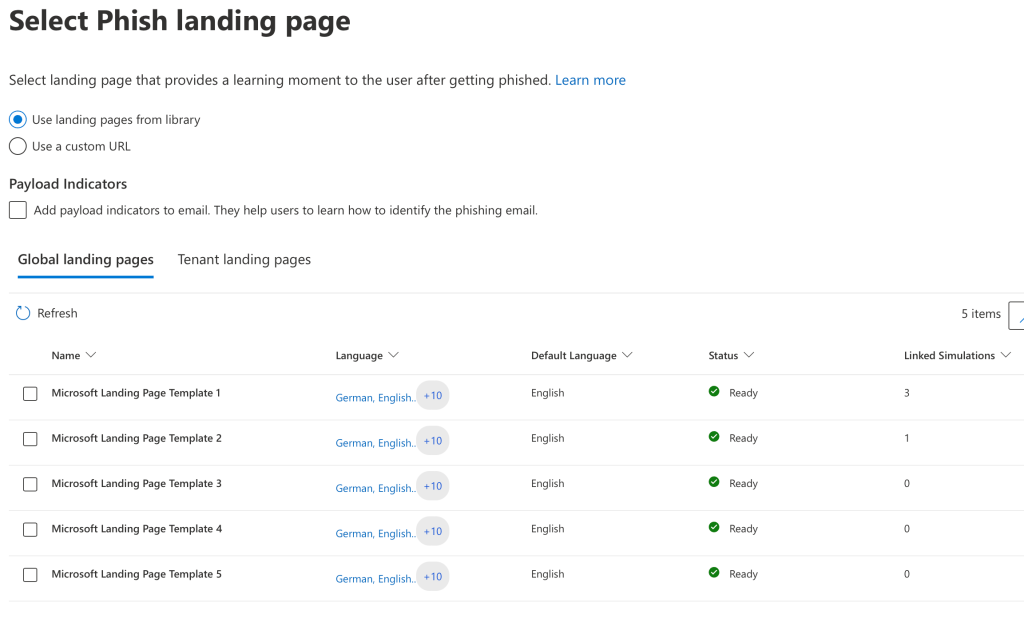
Now you must select a phishing landing page from the available templates, you can select each template to preview the page:
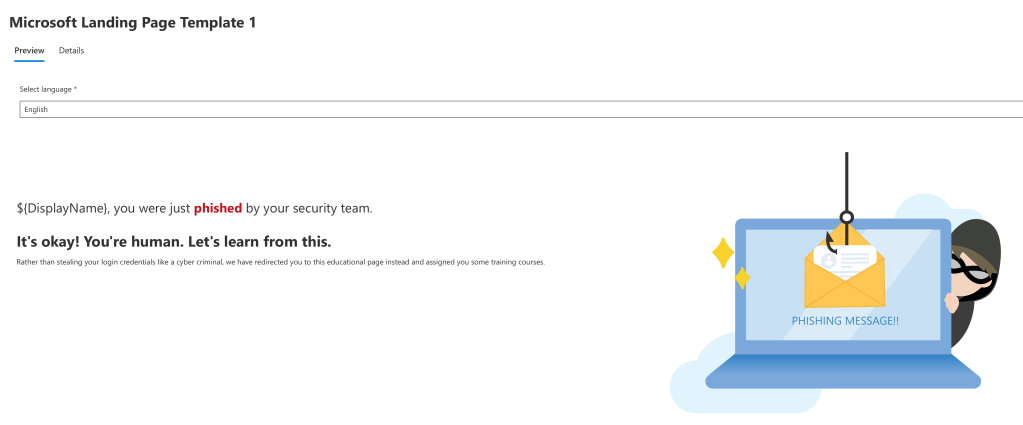
The preview window of the template:
Now you must select the ‘end user notification’, the two dropdowns within the screenshot below are mandatory.
The top drop down selects when you would like the positive reinforcement notification to be delivered if a user has fallen victim to a simulation.
The bottom drop down is how often a reminder notification for assigned training should be delivered, again, if a user has fallen victim to a simulation.

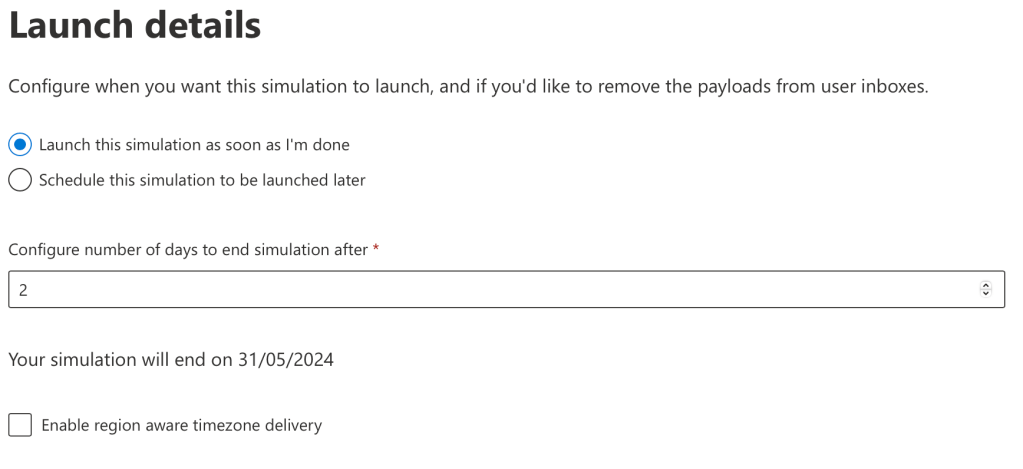
Now we can select when we would like the simulation to launch, and also how many days the simulation should run for.
This is useful to schedule the simulations for a later date. We can also schedule and set a recurrence for simulations through automation, which will be covered in a separate blog!
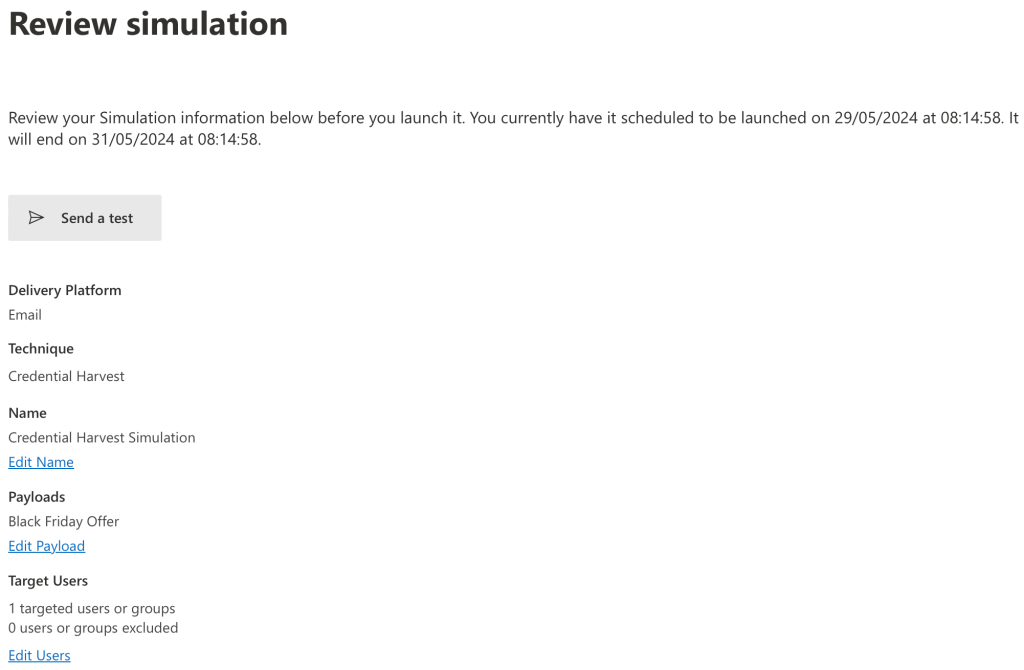
We are now on the final screen of the simulation creation. Please spend some time to review your simulation, you can also press ‘Send a test’ to receive a test of your simulation prior to launching.
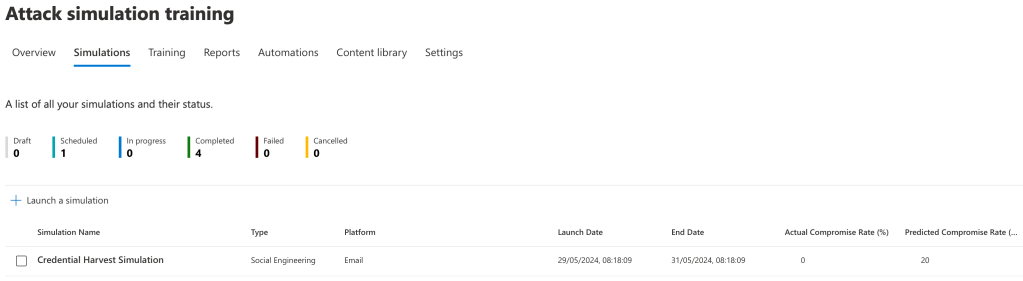
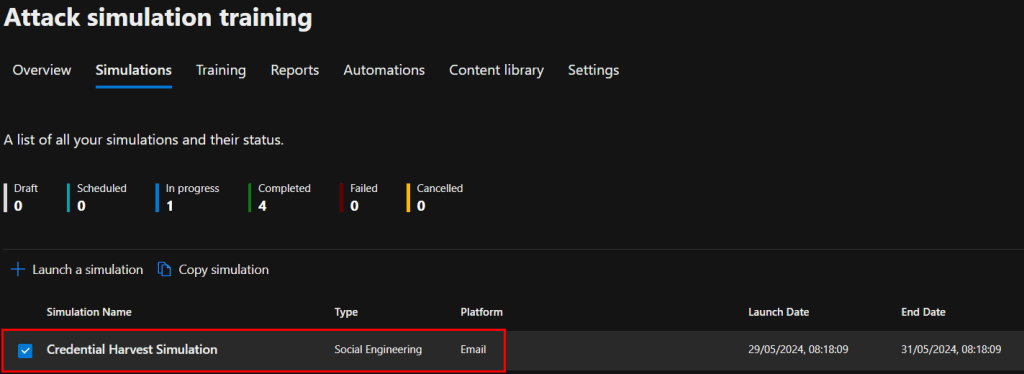
Once your simulation has been created you will be redirected to the ‘Simulations’ screen where you can view your tenants in progress or previous simulations. This window shows some statistics about the simulations, including the type of attack launched, the compromised rates of the simulation and launch dates.
You can click onto the campaign to view statistics – we’ll touch on this later once we’ve seen the recipient view of the attack.
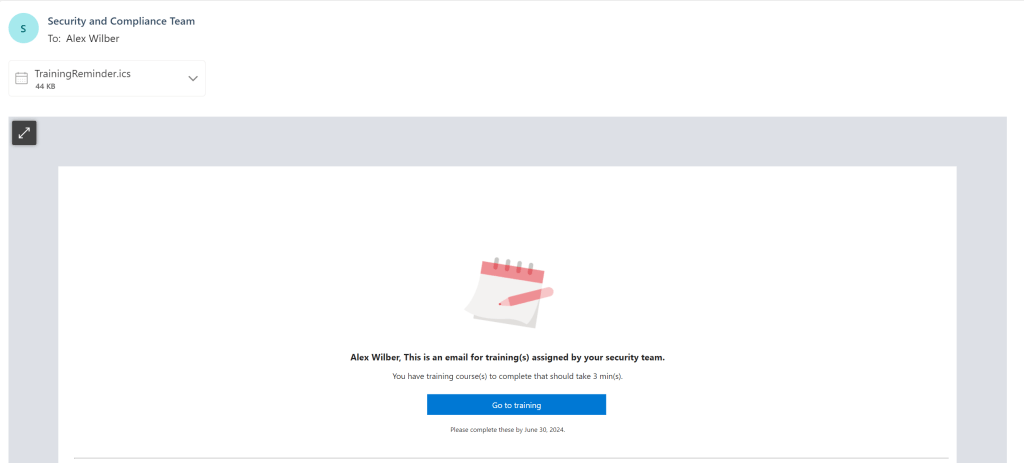
Now, sign into a recipient of the campaign’s Exchange mailbox and you should see your simulated phishing email within the Inbox:
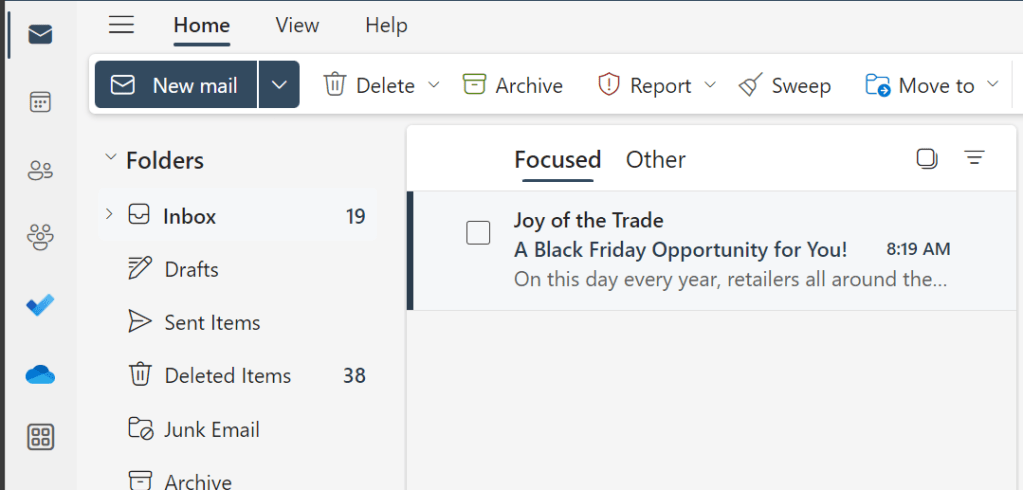
Here is the phishing email we received in our inbox, now, let’s click onto the phishing link to test the functionality and power the metrics:

You will then be taken to a spoofed version of the Microsoft 365 sign-in page, praying on users to enter their valuable credentials:
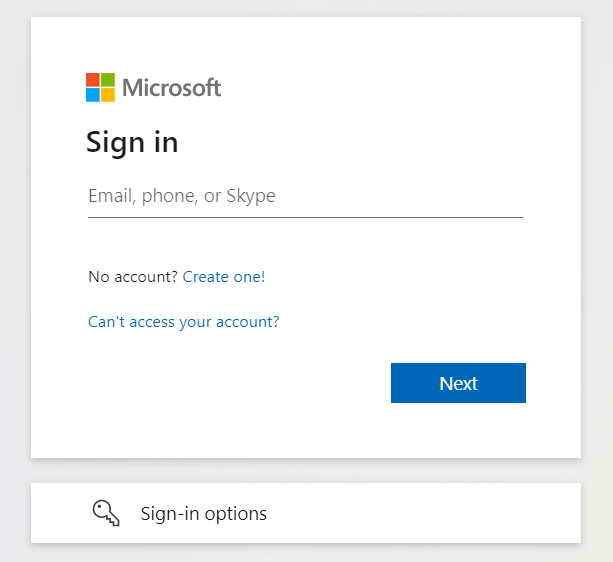
We can also see the web address to confirm this is the phishing simulation spoofed page:

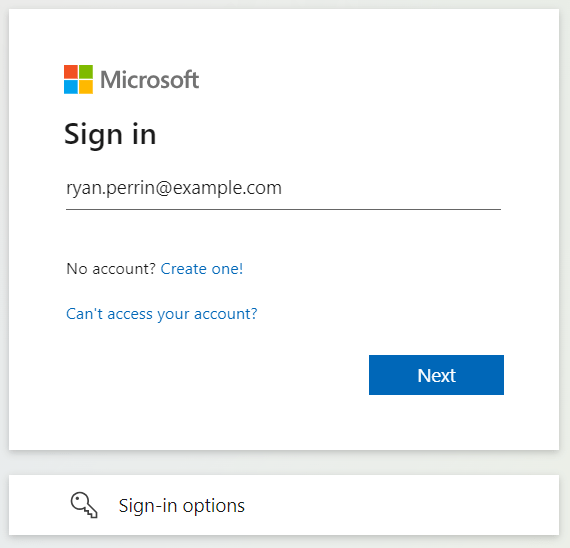
Now enter some credentials into the sign-in field:
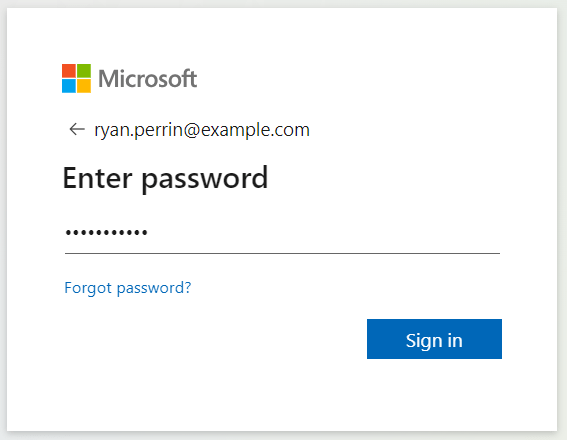
Followed by a password:
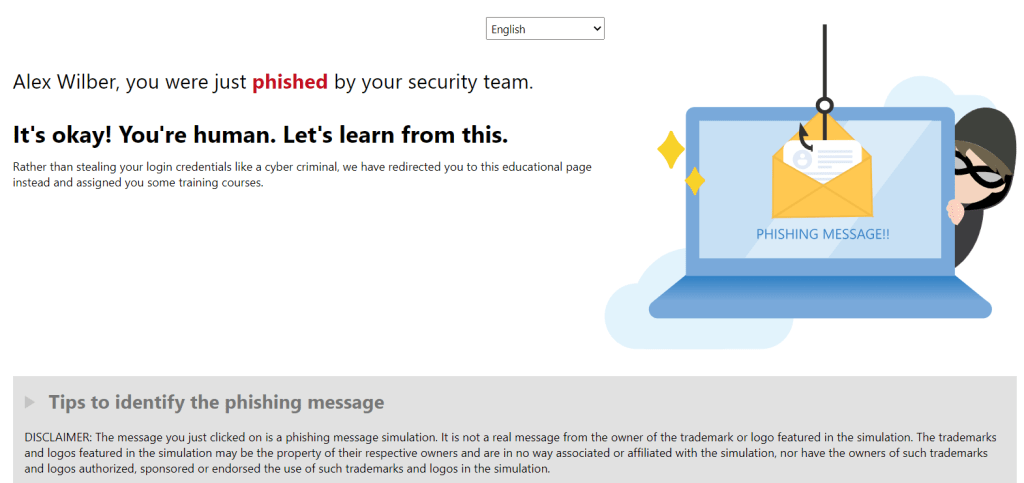
You’ll then be redirected to the landing page, which contains empathetic and supportive messaging to encourage the user to read through the ‘red flags’, complete the assigned training and reinforce the dangers of phishing emails:
In addition to being prompted the above, you’ll also receive the following training notification in your mailbox. This is the training that has been assigned to the user:
This completes the step on ‘Setting Up Your First Campaign’, now we move onto the next step on how to access campaign reporting
How to Access Campaign Reporting
Now if you access Attack Simulator on your admin account again, go back to ‘Simulations’ and click onto your campaign:
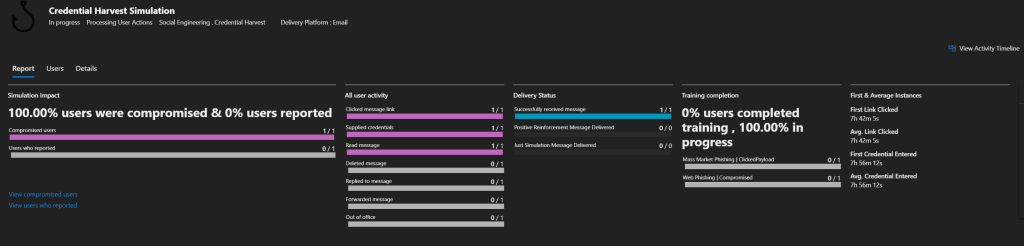
You will then be able to view the statistics and metrics of the campaign, which includes click rate, number of users who have: read, opened, replied, and forwarded the email. Training statistics are also available.
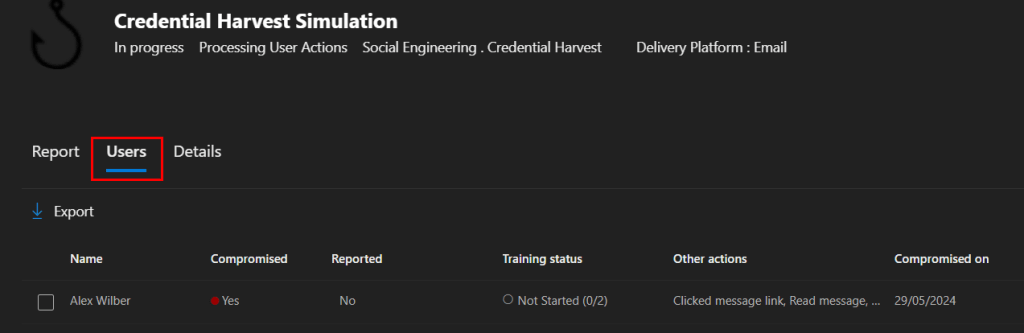
On the ‘Users’ tab you can view down to the individual user level, along with who has been compromised, who has reported, and training progress. You also have the ability to export the list of users:
Now if you return to the overview page, you can select ‘Reports’, which will you provide you with reports on simulation coverage, training, and some other useful metrics.

We have now reached the end of our discussion on Attack Simulator campaign reporting, successfully achieving the goals we set out at the beginning of this blog.
This also concludes the post ‘Attack Simulator: Your First Campaign’. Thank you for taking the time to read through this blog. I hope it has been an informative and enriching experience as you explore the capabilities of Microsoft Attack Simulator.
I will be exploring some of the more advanced features of Attack Simulator within future blog posts, stay tuned!
Resources and Next Steps
To get started or advance your journey with Microsoft Attack Simulator, Microsoft’s official documentation is an invaluable resource.
It offers detailed guides and best practices that cater to both beginners and seasoned professionals.
The community forums are also a treasure trove of insights, where you can engage with other users, share experiences, and find solutions to common challenges.
Whether you’re looking to implement Attack Simulator for the first time or aiming to optimise your current setup, these resources can guide you towards a more secure and resilient cyber security posture, I will place links to the sources below.
Microsoft Attack Simulator Documentation: Microsoft Attack Simulator documentation | Microsoft Learn
Microsoft Defender for Office 365 Community Hub: Microsoft Defender for Office 365 | Microsoft Community Hub
Microsoft Defender for Office 365 Blog: Microsoft Defender for Office 365 Blog | Microsoft Community Hub
I’m eager to hear your thoughts on the blog post and would greatly value your feedback. Feel free to connect with me on LinkedIn or drop me an email – you’ll find the links to both at the top and bottom of this page 🙂
Interested in staying updated with my latest releases? Don’t miss my future blog posts. Subscribe by entering your email in the box below, and stay tuned for every new update!
Thank you for spending a part of your day here. I hope you find your journey into Microsoft Attack Simulator as rewarding as I have.
Stay Secure,
Ryan

Leave a comment