
Contents
- Recap
- Prerequisites
- Objective
- Azure Portal Access
- Create a Resource Group
- Create a Log Analytics Workspace
- Create Your Microsoft Sentinel Instance
- Data Sources and Connectors
- Analytics Rules
- Automations and Playbooks
- Debrief
- Resources and Next Steps
In our previous blog post, “Introduction to Microsoft Sentinel,” we embarked on a journey into the core concepts, benefits, and components that make Microsoft Sentinel a formidable SIEM (Security Information and Event Management) and SOAR (Security Orchestration, Automation, and Response) solution. If you haven’t yet read the introduction, I highly recommend doing so to gain foundational insights before diving deeper into today’s, ‘Create Your First Microsoft Sentinel Instance’.
Here’s a brief recap of what we covered in our previous post:
- Microsoft Sentinel Overview: We introduced Microsoft Sentinel as a cloud-native platform that combines SIEM (Security Information and Event Management) and SOAR (Security Orchestration, Automation, and Response). It offers a unified interface for monitoring, detecting, and responding to cybersecurity threats across both cloud and on-premises environments.
- Benefits of a Cloud-Native SIEM: We discussed the advantages of using a cloud-native SIEM like Microsoft Sentinel, including scalability, cost-effectiveness, speed, agility, advanced security features, flexible data storage, and high availability.
- Core Components of Microsoft Sentinel: We explored the key components that users interact with, such as Data Connectors, Analytics Rules, Incidents, Playbooks, Workbooks, Threat Intelligence, and the powerful Kusto Query Language (KQL).
- How Microsoft Sentinel Works: We outlined the operational flow of Microsoft Sentinel, from data ingestion and threat detection to alerts, incidents, investigation, and automated response. We also highlighted its continuous learning capabilities and support for proactive threat hunting.
- Microsoft Sentinel in Action: We walked through a practical scenario where Microsoft Sentinel shines, illustrating how it detects, automates, investigates, and resolves a sophisticated phishing attack.
- Conclusion and Next Steps: We concluded by emphasizing the integration, automation, and analytics capabilities of Microsoft Sentinel and encouraged readers to consider its benefits for their security operations. We also provided resources and next steps for those interested in diving deeper into Microsoft Sentinel.
Now that we’ve laid the foundation and understanding of Microsoft Sentinel, it’s time to take the next step in our journey.
In our upcoming blog post, “Creating Your First Microsoft Sentinel Instance” we will guide you through the practical steps of creating your own Sentinel workspace, configuring data sources, and leveraging its powerful capabilities to significantly improve your organisation’s security posture.
Stay tuned for this exciting instalment as we dive into the hands-on aspect of Microsoft Sentinel. Subscribe to our updates, and let’s continue our exploration of this cutting-edge security solution!
Prerequisites:
- Microsoft Entra Tenant: It’s essential to have an Entra tenant. If you’re not currently in possession of an Entra tenant, you can create one and receive free credits by visiting: Azure Free Account.
- Active Azure Subscription for Microsoft Sentinel: Utilising Microsoft Sentinel requires an active Azure subscription. If you haven’t set one up yet, options include signing up for a free trial or a pay-as-you-go subscription via the Azure portal. If you’ve already registered through the provided link for the Azure free account, you’ve completed this step.
- Entra ID Permissions: To configure Microsoft Sentinel effectively, adequate permissions within Entra ID are essential. Ideally, holding the role of a Global Administrator is necessary for activating most components within Microsoft Sentinel. Alternatively, having the role of a Security Administrator may suffice for managing the required settings, but keep in mind that the Global Administrator role offers comprehensive access and control.
Objective
As the assigned Cyber Security Engineer, your objective is to establish your organisation’s first Microsoft Sentinel instance.
Begin by creating a dedicated Resource Group and establishing a Sentinel workspace within this group
Then, ensure comprehensive security monitoring by integrating the Microsoft Entra ID and the Azure Activity connector.
To enhance threat detection capabilities, establish the following analytics rules on the data sources:
- Microsoft Entra ID: MFA Spamming followed by Successful login.
- Azure Activity: Suspicious number of resource creation or deployment activities.
Finally, implement an automated process that triggers an email notification whenever an incident is reported, ensuring a swift response to potential security breaches.
Azure Portal Access:
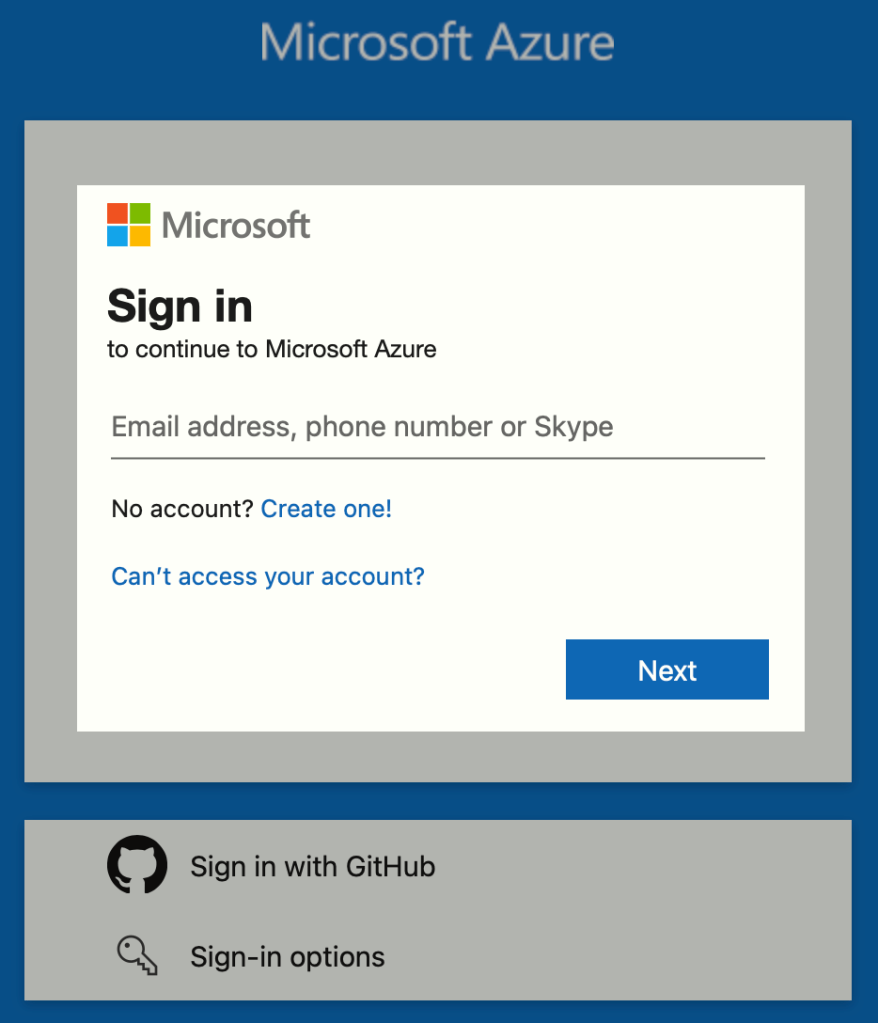
First and foremost, we need to visit https://portal.azure.com, the central location where we’ll be deploying all the components for our Microsoft Sentinel deployment. Sign in using your Administrative Credentials.
Create a Resource Group
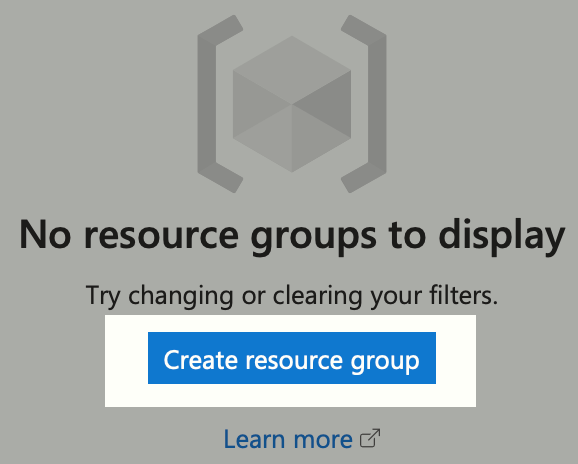
Once you’ve accessed the Azure portal, our initial step involves establishing a Resource Group. This will serve as the foundation for organizing all our Microsoft Sentinel components. Search for ‘Resource Groups’ in the search bar.

Now, hit ‘Create resource group’:
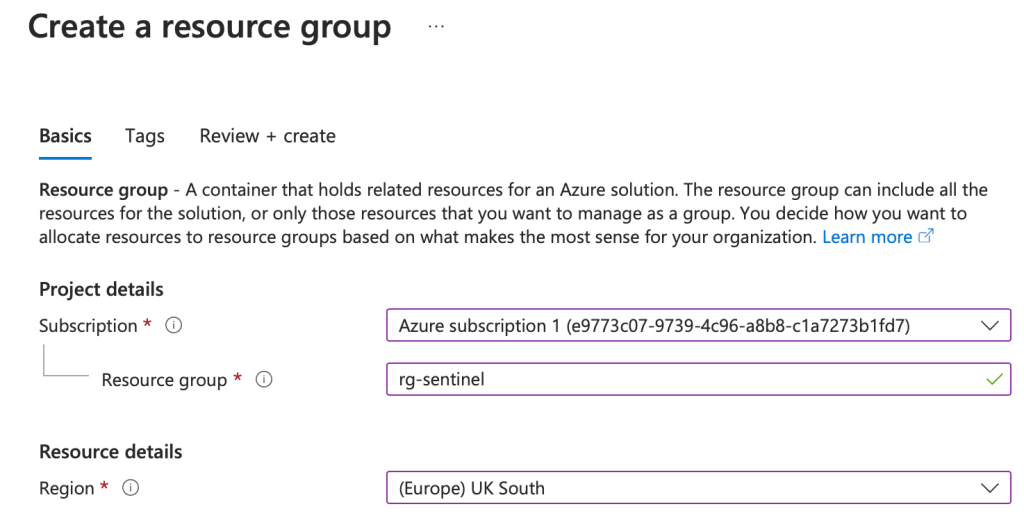
Begin by assigning a meaningful name to your Resource Group, select the appropriate region, and then proceed by clicking ‘Review + Create’:
Review the details of the Resource Group and then hit ‘Create’:
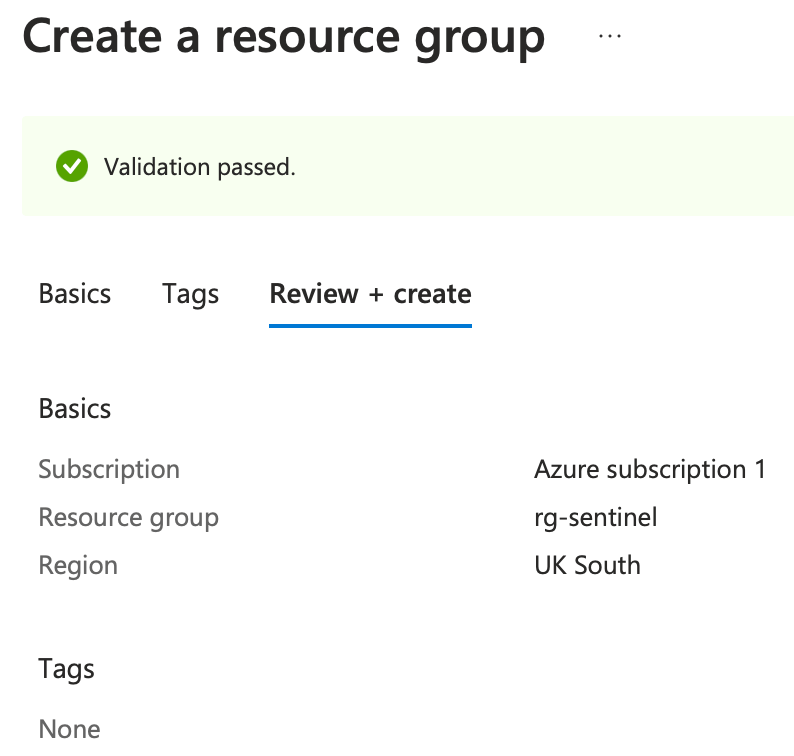
Following this, you will be directed to the Resource Groups page, where you can view the Resource Group you just created.

Create a Log Analytics Workspace
Microsoft Sentinel operates on the foundation of a Log Analytics workspace, which serves as the critical backbone and core infrastructure for the entire integration. It acts as a centralised hub for data storage, processing, and analysis, making it instrumental in Sentinel’s functionality and efficiency. By funnelling data from various sources—spanning Azure services, on-premises infrastructures, and other cloud platforms—into the workspace, Sentinel leverages this consolidated data pool to execute its advanced analytics.
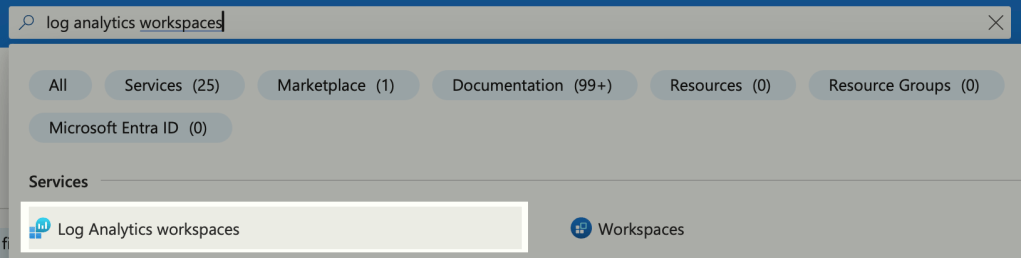
Let’s proceed by setting up our initial Log Analytics workspace. Simply navigate to the search bar within the portal and enter ‘Log Analytics workspace’.
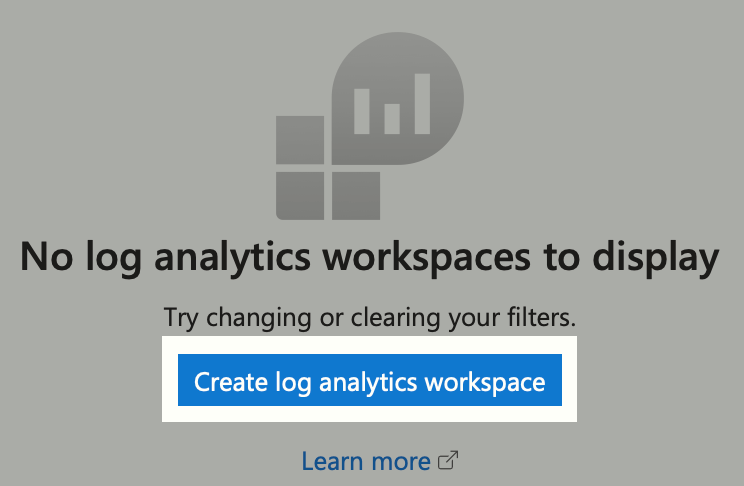
Next, click on ‘Create log analytics workspace’.
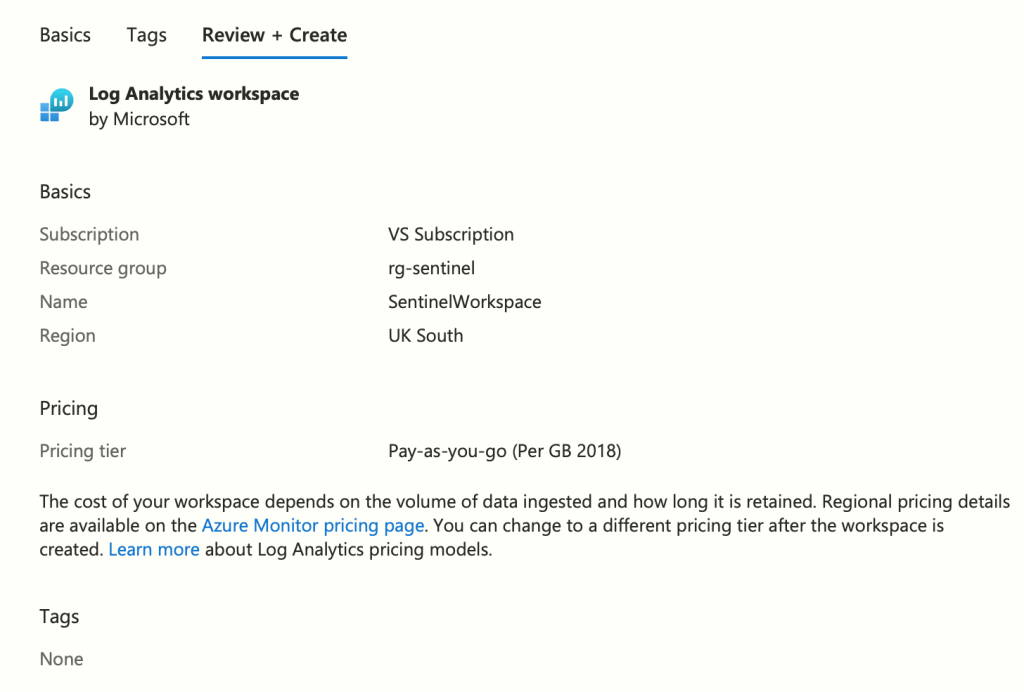
Next, fill in the required details, ensuring to give your workspace a name that is easily identifiable, as this will pull directly through to your Sentinel Workspace. Then hit ‘Review + Create’:

Review your Log Analytics workspace details and then hit ‘Create’:
Create your Microsoft Sentinel instance
Next, we are going to establish our Microsoft Sentinel instance on our Log Analytics workspace. Search for ‘Microsoft Sentinel’ in the portal search bar.

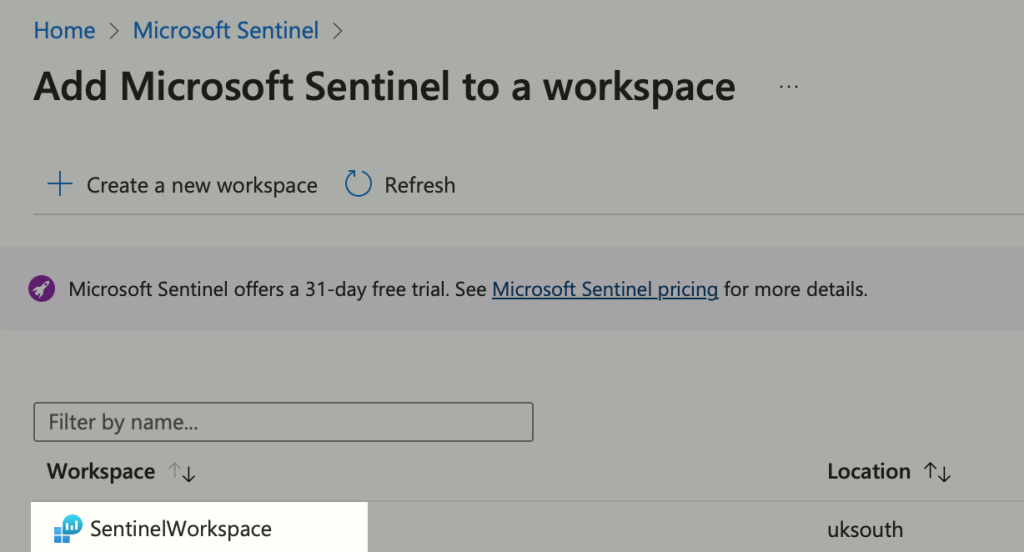
Hit ‘Create Microsoft Sentinel’:

Choose the Log Analytics workspace you previously set up in the last step and hit ‘Add’.
In just a few moments, you’ll be navigated to your newly created Microsoft Sentinel instance, marking the completion of our initial setup phase. Next, we’ll move on to the data ingestion process, aligning with our outlined objectives.

Data Sources and Connectors
Data sources serve as the backbone of Microsoft Sentinel, supplying the essential raw data required for generating security insights. The value of these data sources is underscored by Sentinel’s ability to conduct thorough monitoring, enabling the aggregation of data from hybrid environments that encompass cloud services, on-premises networks, and a variety of applications. This broad spectrum of data collection is critical for conducting real-time analysis and ensuring efficient threat detection.
Next, we’ll begin aggregating logs from our data sources using ‘Data Connectors’. The initial step involves deploying these data connectors within our Sentinel instance, a task that can be executed through the ‘Content Hub’.
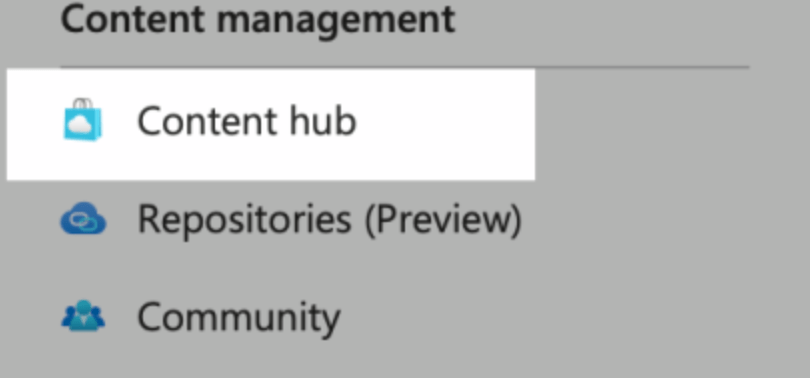
Upon accessing the Content Hub in Microsoft Sentinel, you’ll find it serves as a centralised platform offering a comprehensive suite of security content. This includes data connectors, analytics rules, and workbooks. The Content Hub streamlines the integration and customization process within Sentinel by offering an array of pre-built templates and solutions from Microsoft and the wider security community. This functionality empowers users to quickly deploy advanced security strategies, thereby improving efficiency in threat detection and response.

Let’s start by installing the ‘Microsoft Entra ID’ solution. Simply search for the solution, select, and click ‘Install’ to proceed.

Once the Solution has installed you will be prompted in Notifications with ‘Install Success’.

Now, whilst we’re in the Content Hub, let’s install the ‘Azure Activity’ Solution, which is also part of our objective.

Next, we will navigate to ‘Data Connectors’, which is available in the Sentinel context menu.

You are now presented with the two Data Connectors we installed from Solutions, click onto ‘Microsoft Entra ID’ and hit ‘Open connector page’:

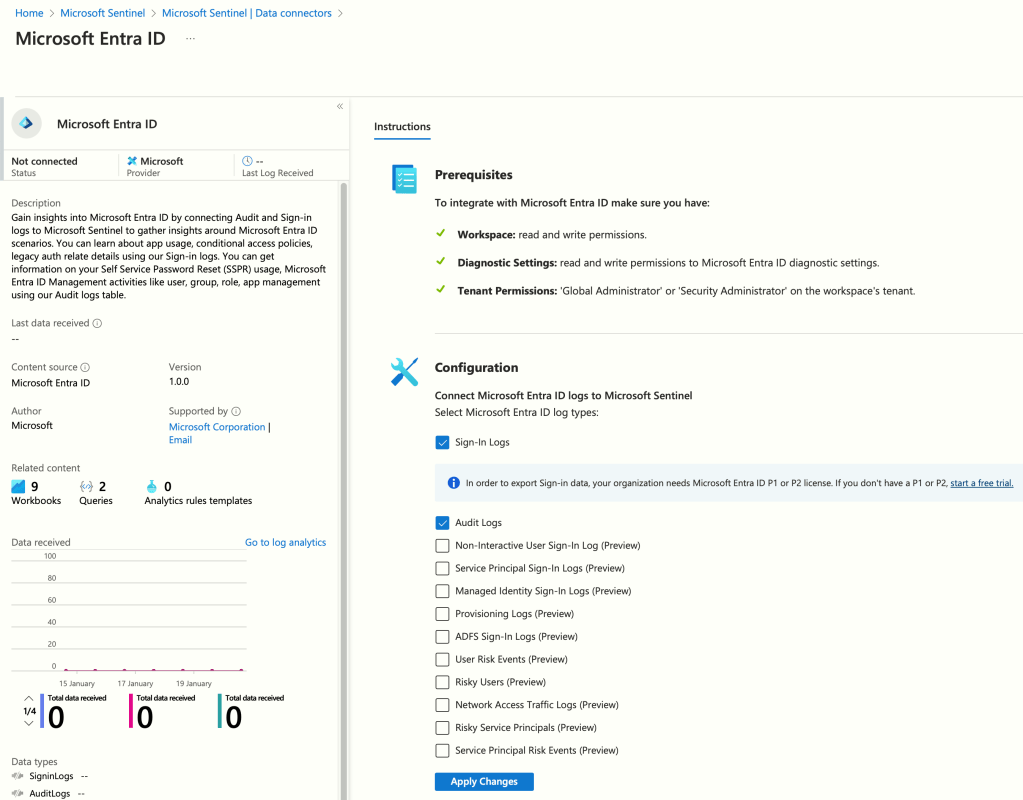
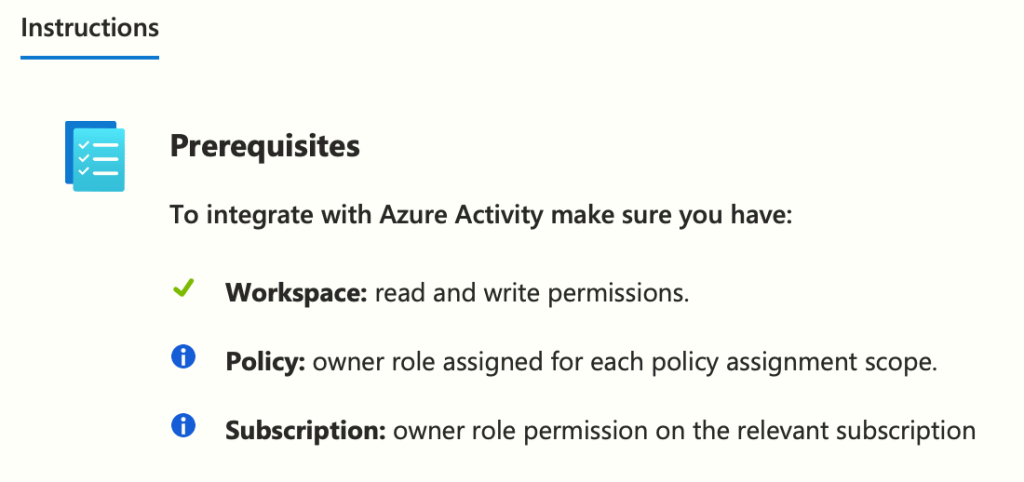
You’ve arrived at the Data Connector page, a comprehensive hub offering a detailed overview, insights into the types of data you’ll be collecting, and a step-by-step guide for installation. This page also outlines any prerequisites needed to ensure a smooth setup process.
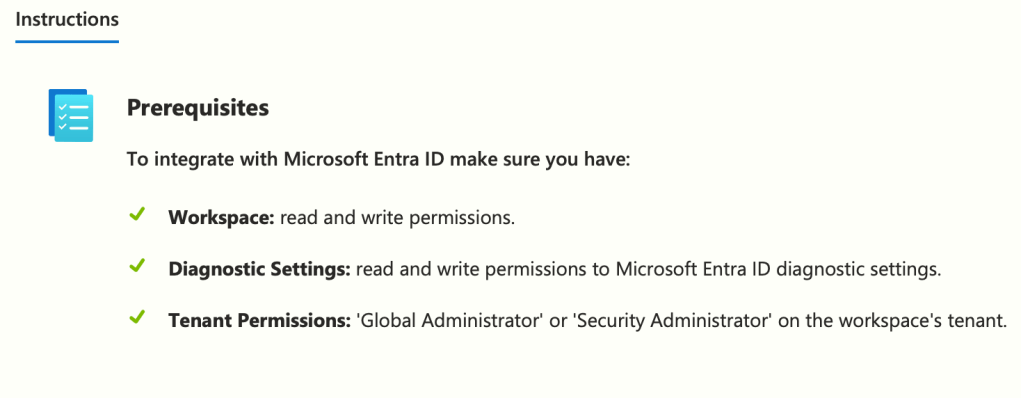
Before moving forward, it’s crucial to first confirm that you have fulfilled all the prerequisites mentioned in the earlier sections of this blog.
To meet our objective, we need all logs from the ‘Microsoft Entra ID’ connector, so I will select all the available options. Be aware that this action will result in charges to the Subscription.

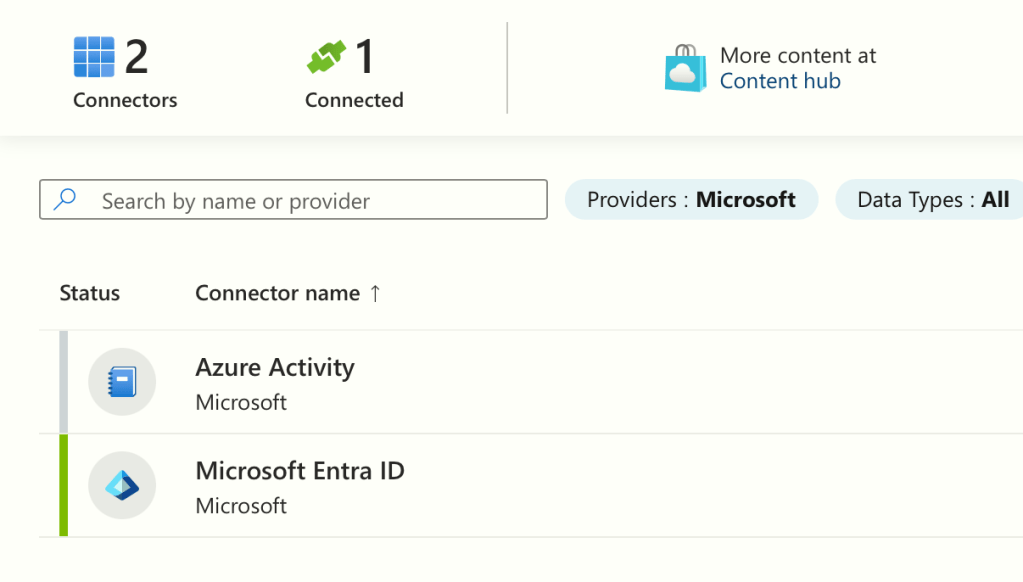
The connector will now begin to ingest logs. Please allow around 15 minutes for the data to start appearing and for the connector’s status to update to ‘Connected’, as illustrated below:

With our ‘Microsoft Entra ID’ connector now set to ‘Connected’, we’ll proceed to the ‘Azure Activity’ connector. Please click on ‘Open connector page’ to continue.
Before proceeding, prioritise the verification of your successful completion of all prerequisites, as outlined in this blog.
By meeting these prerequisites, you ensure that the Azure Activity data connector can function properly, collect the required data, and contribute to comprehensive security monitoring and analysis within your Azure environment.
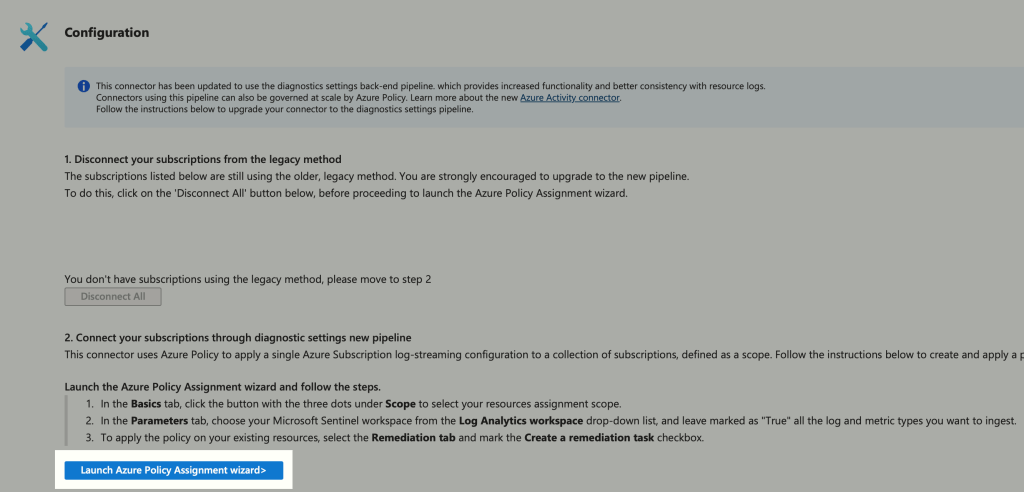
Hit ‘Launch Azure Policy Assignment Wizard’:
Now within the wizard, select your scope of the resources, I will select the subscription, followed by ‘Next’:

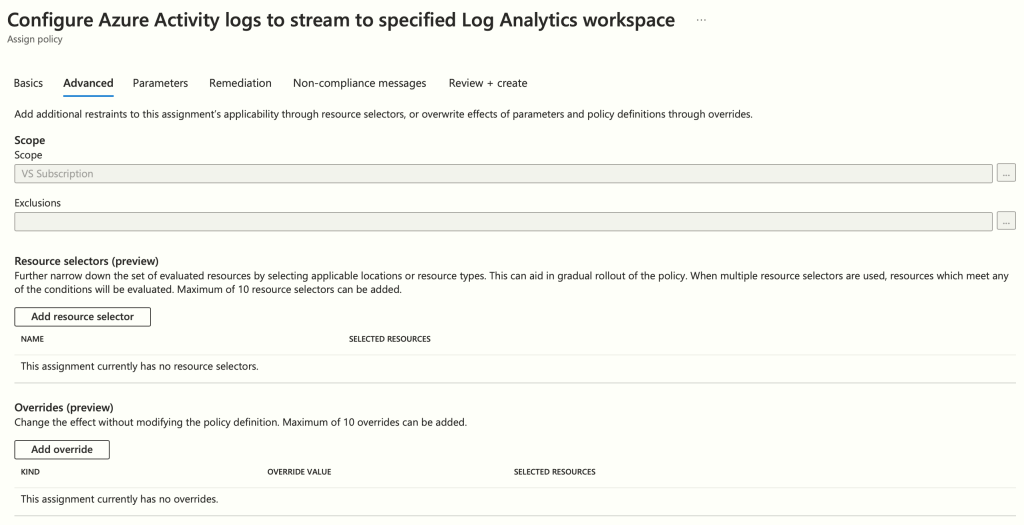
On the ‘Advanced’ page, you have the option to configure resource filters. We’ll keep the settings at their default for now, so go ahead and click ‘Next’.
On the ‘Parameters’ page, select the Sentinel Workspace, then hit ‘Next’:

On the ‘Remediation’ page, opt for ‘Create a remediation task’. This enables the Policy to adjust Azure Activity diagnostics settings to direct towards our Sentinel workspace. Additionally, choose ‘Create a Managed Identity’ before proceeding with ‘Next’.

On ‘Non-compliance messages’, we will leave blank, hit ‘Next’:

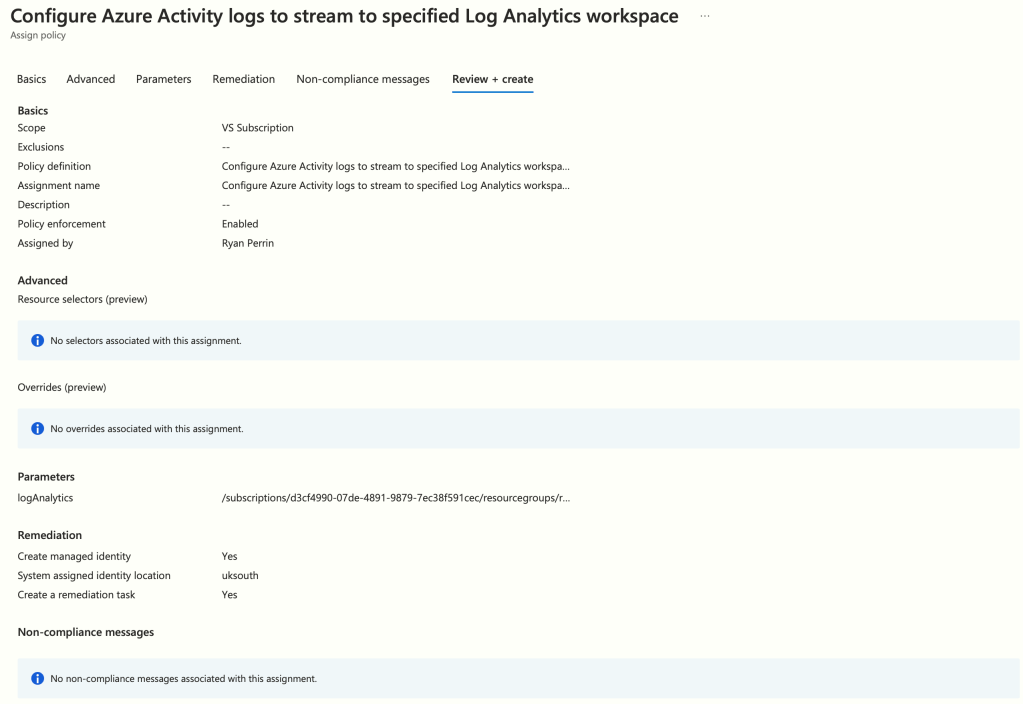
Finally, review the Policy and then hit ‘Create’:
Returning to the Azure Activity connector, you should notice the connection status switch to ‘Connected’ after approximately 15 minutes.
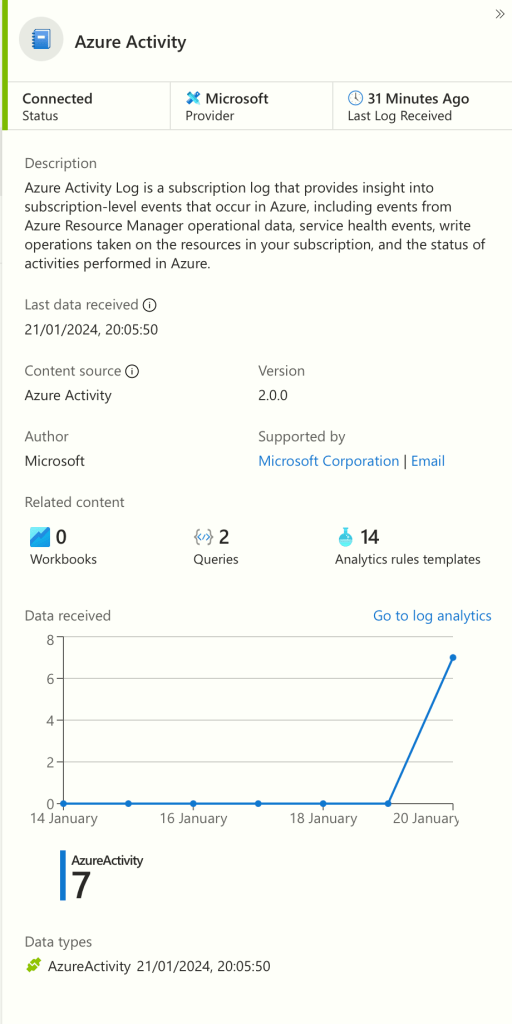
With this step, we’ve successfully configured our data connectors in Microsoft Sentinel. Next, we’ll explore the implementation of Analytics Rules for these data sources, aligning with our objectives.
Analytics Rules
Analytics Rules in Microsoft Sentinel play a crucial role in threat detection, leveraging the extensive data from connected sources to provide accurate and insightful security analyses. These rules enable Sentinel to intelligently analyse vast data volumes, identifying subtle anomalies and patterns that indicate security threats. Their role in efficiently correlating data from various sources is crucial for a proactive and robust security posture, making them a key component of Sentinel’s defence strategy.
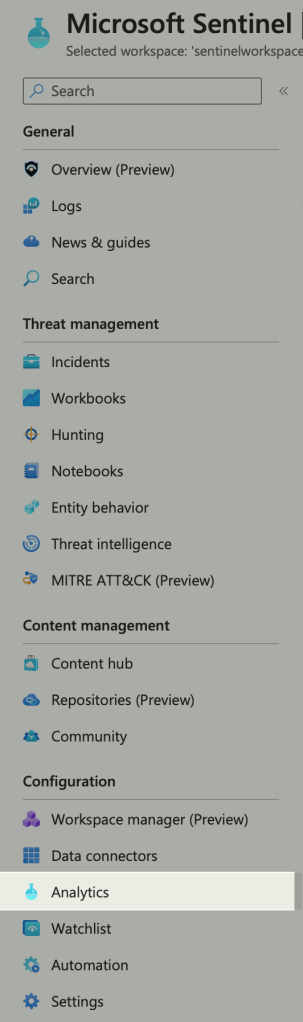
Navigate to ‘Analytics’ within Microsoft Sentinel:
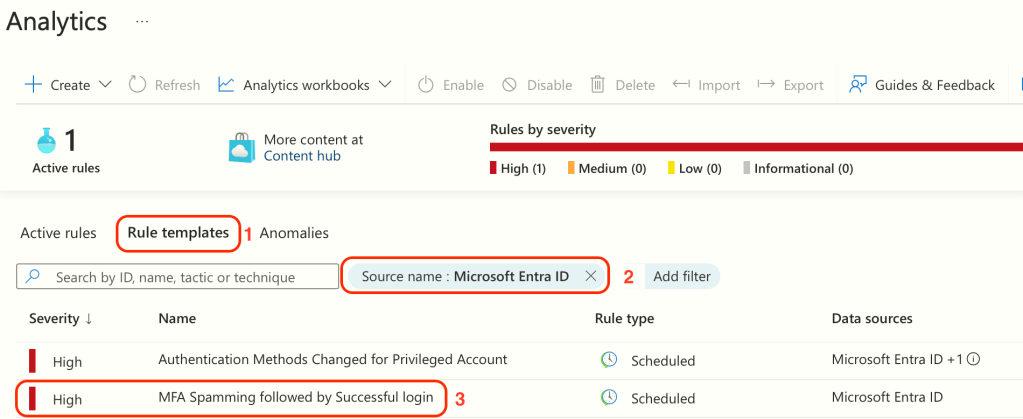
When you reach the Analytics screen, proceed as follows:
- Choose ‘Rule templates’.
- Apply a filter for Source Name, and select ‘Microsoft Entra ID’.
- Click on the ‘MFA Spamming followed by Successful login’ rule.
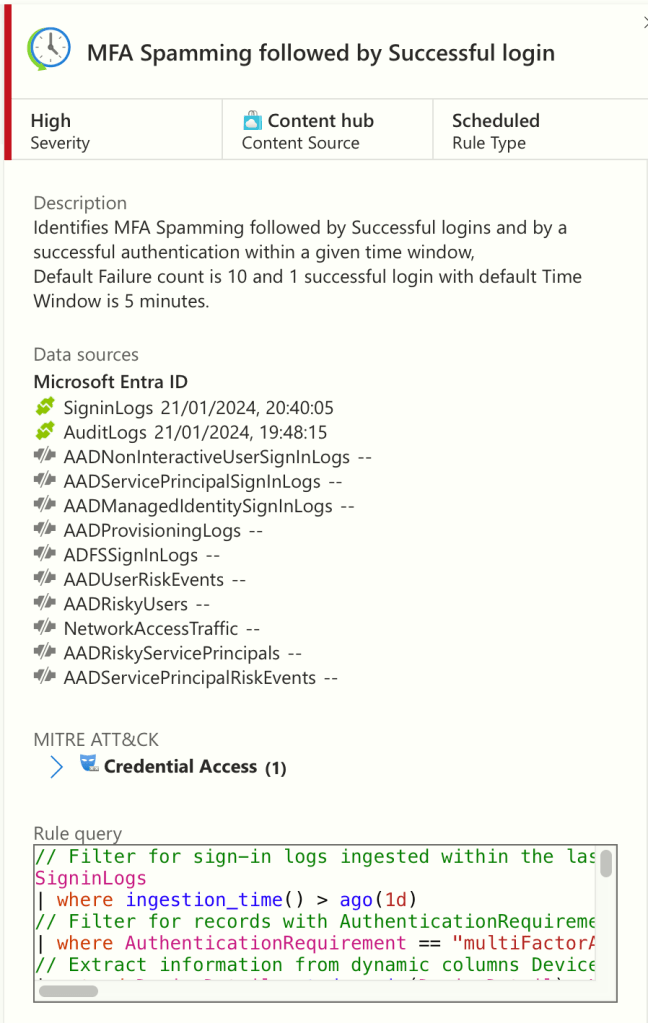
This will open the rule detail pane, where you can access a variety of information including rule descriptions, coverage within the MITRE ATT&CK framework, as well as both required and currently ingested data types, among other details. Hit ‘Create rule’:
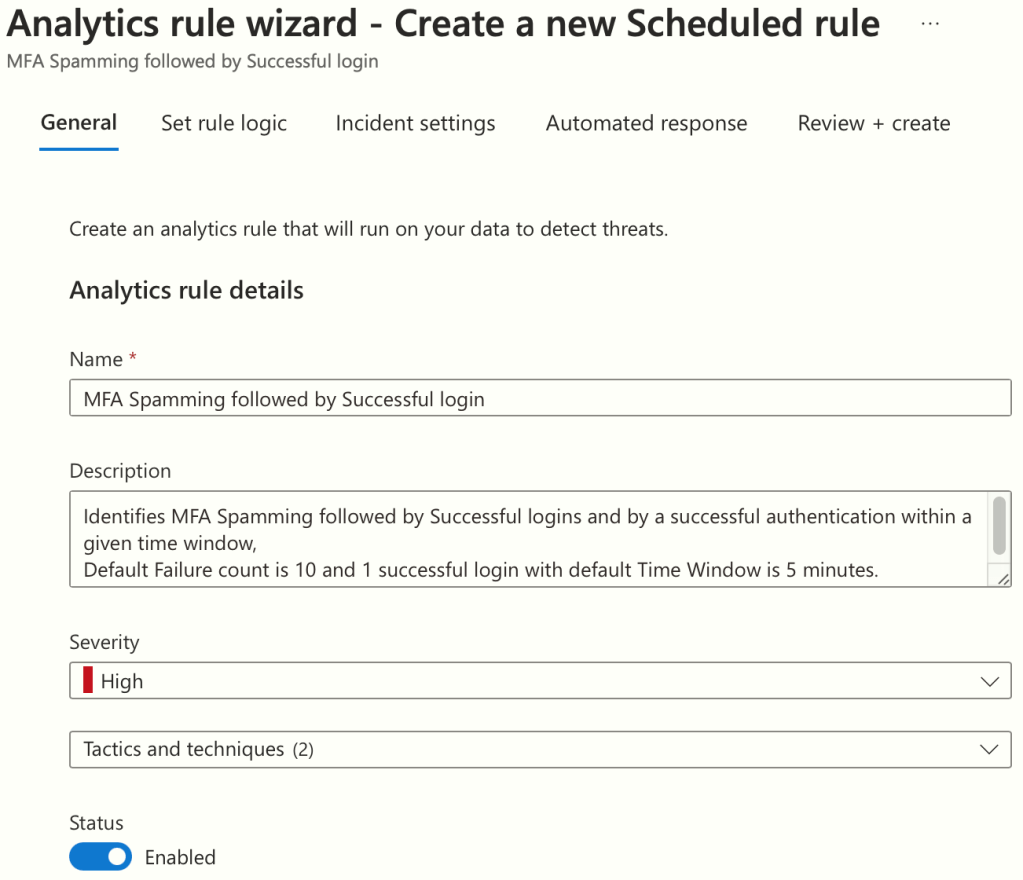
We are now introduced to the ‘Analytics Rule Wizard.’ The initial ‘General’ page displays basic information such as the rule’s name, description, severity, and MITRE ATT&CK tactics & techniques. These can be left at their default settings. Simply click ‘Next’ to proceed.
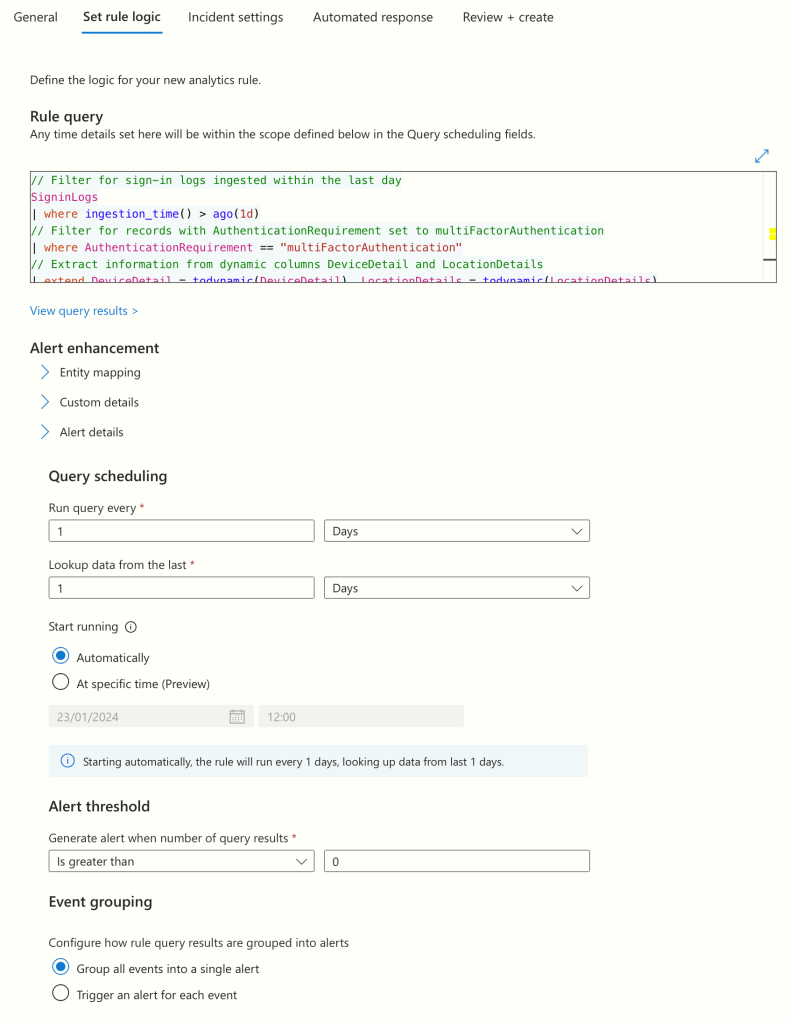
On the ‘Set Rule Logic’ page, you are presented with options to configure the query, its scheduling, and threshold settings. Additionally, you can utilise the ‘Results Simulation’ feature to check if the rule validates against existing data. After making the desired adjustments, click ‘Next’ to continue.
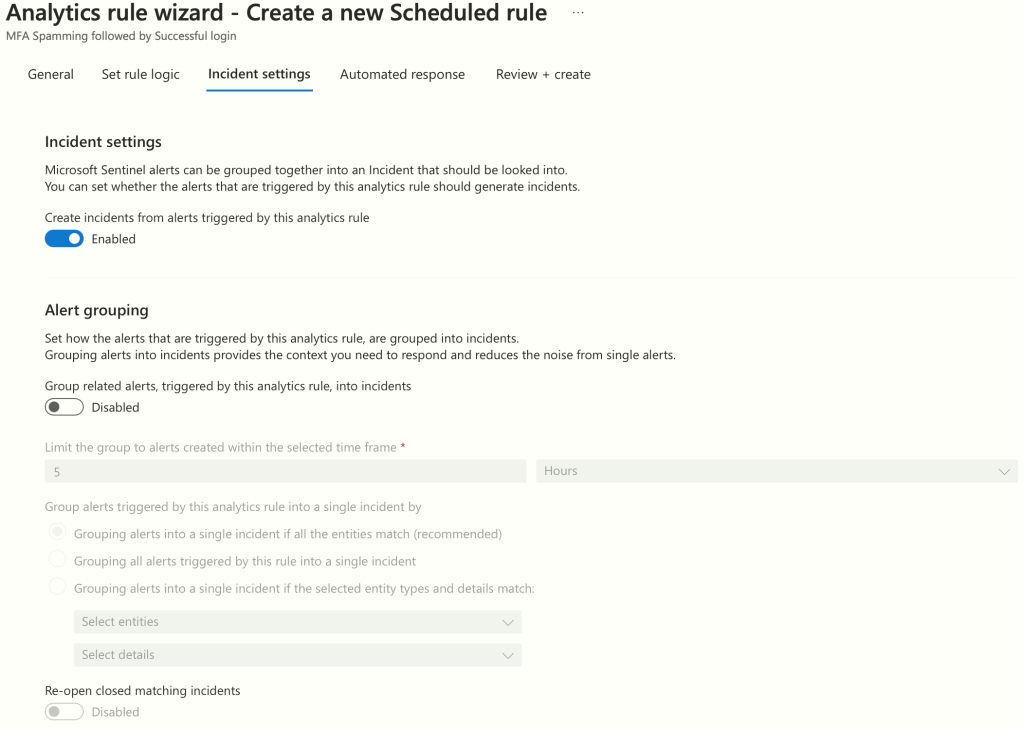
On the ‘Incident Settings’ page, you will encounter options for configuring how alerts are generated within Sentinel, a crucial feature for notifying analysts about potential threats. For now, we’ll retain the default settings, which are configured to trigger an alert. Simply click ‘Next’ to proceed.
On the ‘Automated Response’ page, you have the option to activate automations that will execute when this Analytics rule is triggered. For instance, an automation could initiate a playbook to send an email to the SOC team or post a message in their Teams channel. We will explore automations in more detail in a separate section later in this blog post. Click ‘Next’ to continue.

On the ‘Review + Create’ page, take a moment to review the rule, especially if you’ve made any configuration changes. Ensure that the validation status at the top of the page reads ‘Passed’. Once you are satisfied with the configurations, click ‘Save’ to finalise the rule.

We have successfully created our first Analytics rule within Sentinel. Now we need to create the Azure Activity rule set out in our objective.

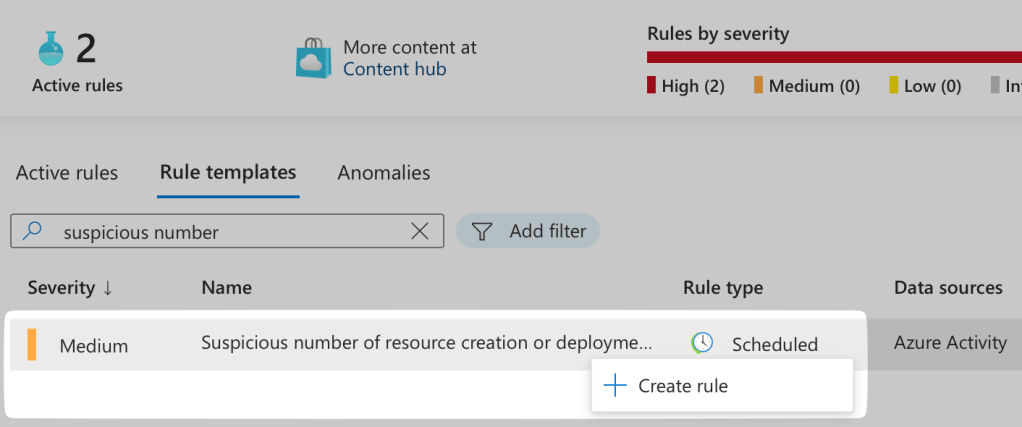
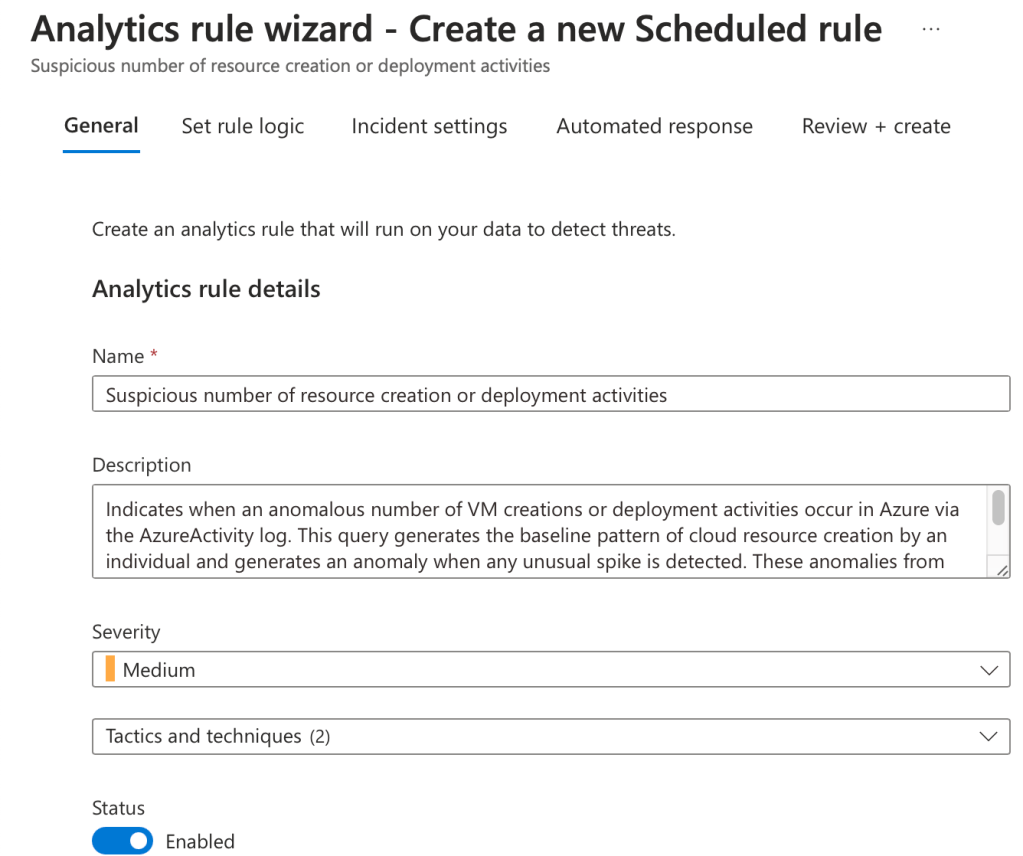
Click back onto ‘Rule templates’ and search for ‘Suspicious number of resource creation or deployment activities’, right click and hit ‘Create rule’:
Now you are presented with the Analytics Rule wizard. The initial ‘General’ page displays basic information such as the rule’s name, description, severity, and MITRE ATT&CK tactics & techniques. These can be left at their default settings. Simply click ‘Next’ to proceed.
On the ‘Set Rule Logic’ page, you are presented with options to configure the query, its scheduling, and threshold settings. Additionally, you can utilise the ‘Results Simulation’ feature to check if the rule validates against existing data. After making the desired adjustments, click ‘Next’ to continue.

On the ‘Incident Settings’ page, you will encounter options for configuring how alerts are generated within Sentinel, a crucial feature for notifying analysts about potential threats. For now, we’ll retain the default settings, which are configured to trigger an alert. Simply click ‘Next’ to proceed.

On the ‘Automated Response’ page, you have the option to activate automations that will execute when this Analytics rule is triggered. For instance, an automation could initiate a playbook to send an email to the SOC team or post a message in their Teams channel. We will explore automations in more detail in a separate section later in this blog post. Click ‘Next’ to continue.

On the ‘Review + Create’ page, take a moment to review the rule, especially if you’ve made any configuration changes. Ensure that the validation status at the top of the page reads ‘Passed’. Once you are satisfied with the configurations, click ‘Save’ to finalise the rule.

We have successfully set up our Analytics Rules for the Microsoft Entra ID and Azure Activity data sources, completing this phase. Next, we’ll explore implementing automations in Sentinel to respond to incidents triggered by these rules.

Automations and Playbooks
Automation and Playbooks within Microsoft Sentinel are vital elements in streamlining and enhancing the security response process.
By automating repetitive tasks and orchestrating complex workflows, they significantly reduce the time and effort required to address security incidents.
Playbooks, powered by Azure Logic Apps, allow for the customization and execution of a series of actions triggered by specific conditions, ensuring that responses are both swift and consistent.
This automation capability not only accelerates the mitigation of threats but also ensures that the security team can focus on more strategic tasks, thereby fortifying Sentinel’s overall defence mechanism and contributing to a more resilient cyber security framework.
Revisiting our goal, it’s essential to notify the SOC team via email whenever an incident occurs within Microsoft Sentinel. To accomplish this, navigate to the ‘Content Hub’ and look up ‘Sentinel SOAR Essentials’, which includes the necessary playbooks for email alerting. Hit ‘Install’:

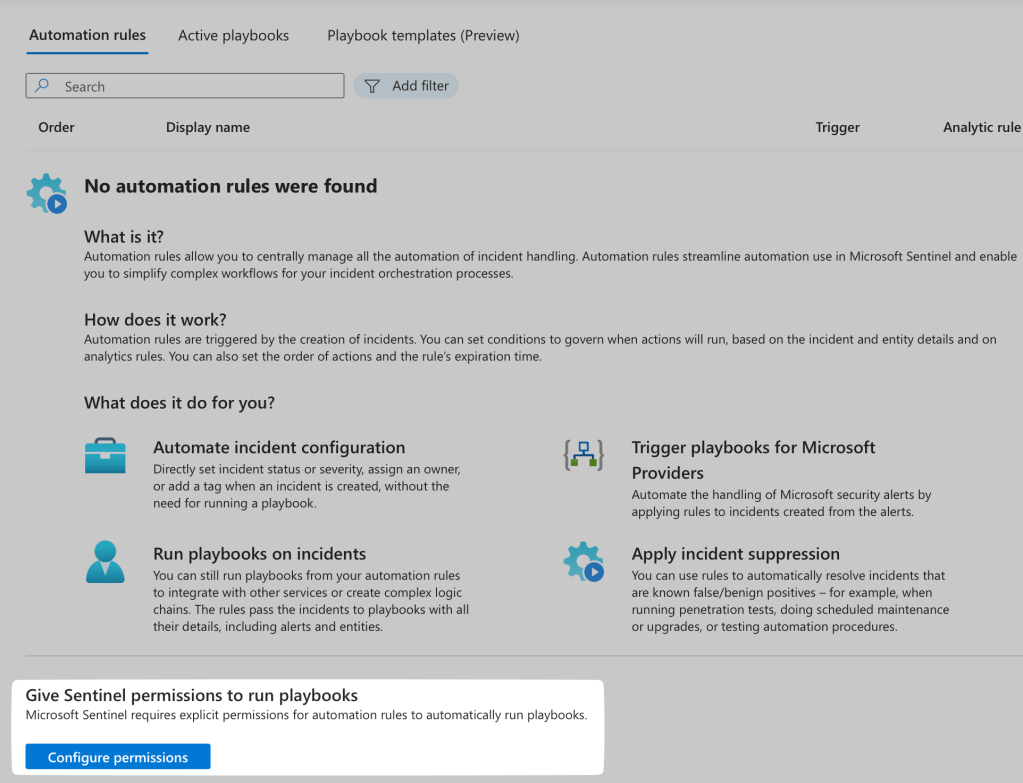
Next, visit ‘Automation’ within Microsoft Sentinel.

Our first step within ‘Automation’ is to configure the Playbook permissions, hit ‘Configure permissions’:
Select the Resource Group housing your Sentinel workspace, and hit ‘Apply’:

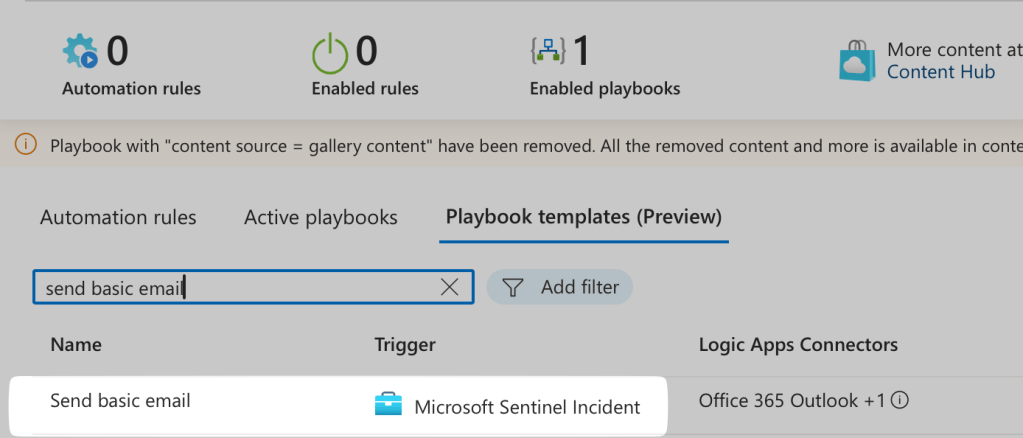
Next, within the ‘Automations’ section, go to ‘Playbook templates’, find the ‘Send basic email’ playbook, select it, and then click on ‘Create playbook’.
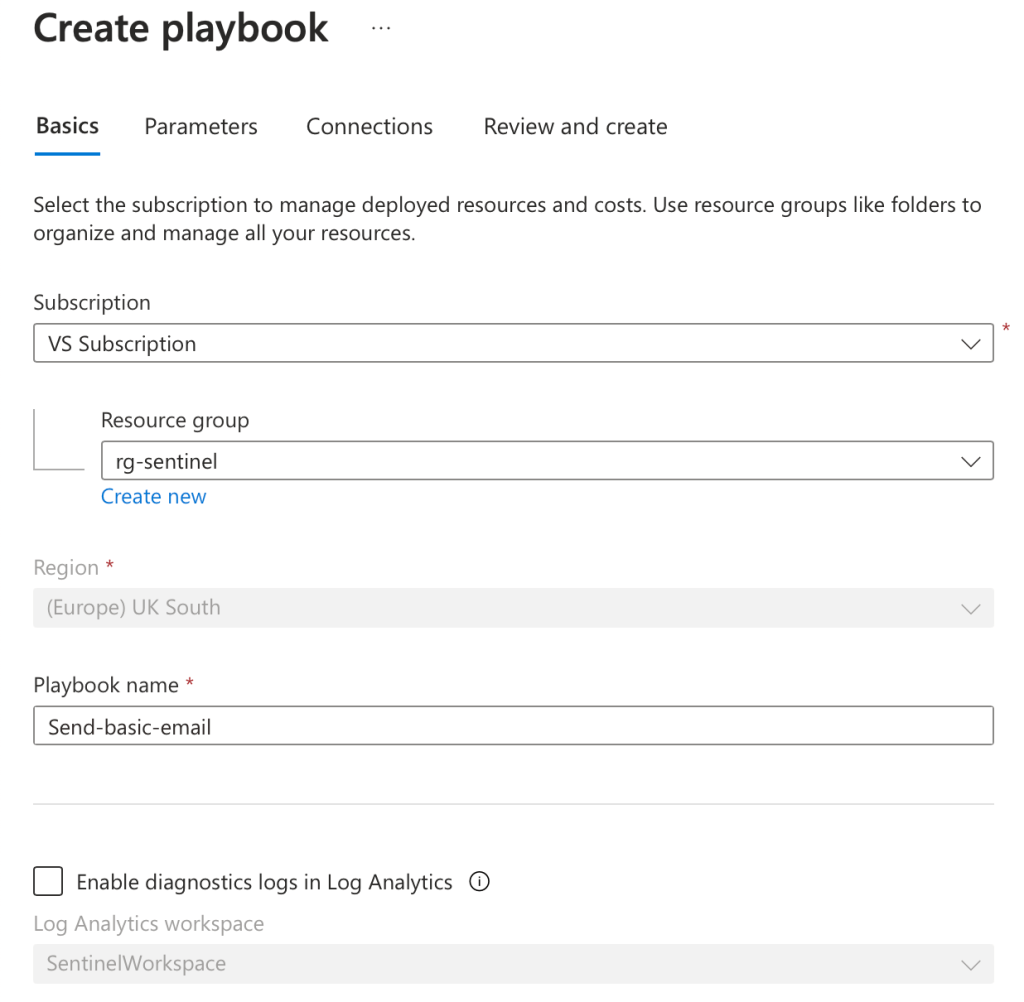
Within the ‘Create playbook’ basics screen, leave as defaults and hit ‘Next’:
Within the ‘Parameters’ screen is where we will enter our recipient for the email notifications, usually this will be your SOC. Once you have entered this, hit ‘Next’.

On the ‘Connections’ page, hit ‘Next’:

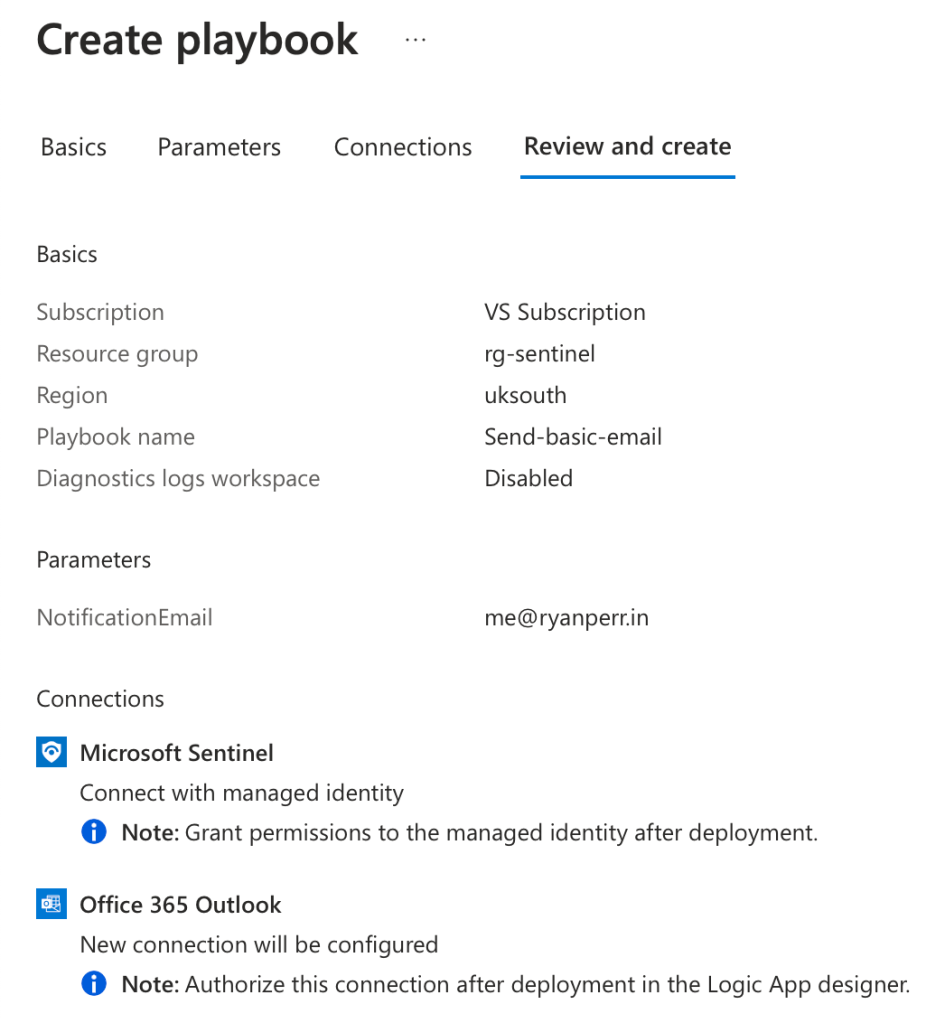
Review the details and then hit ‘Create playbook’.
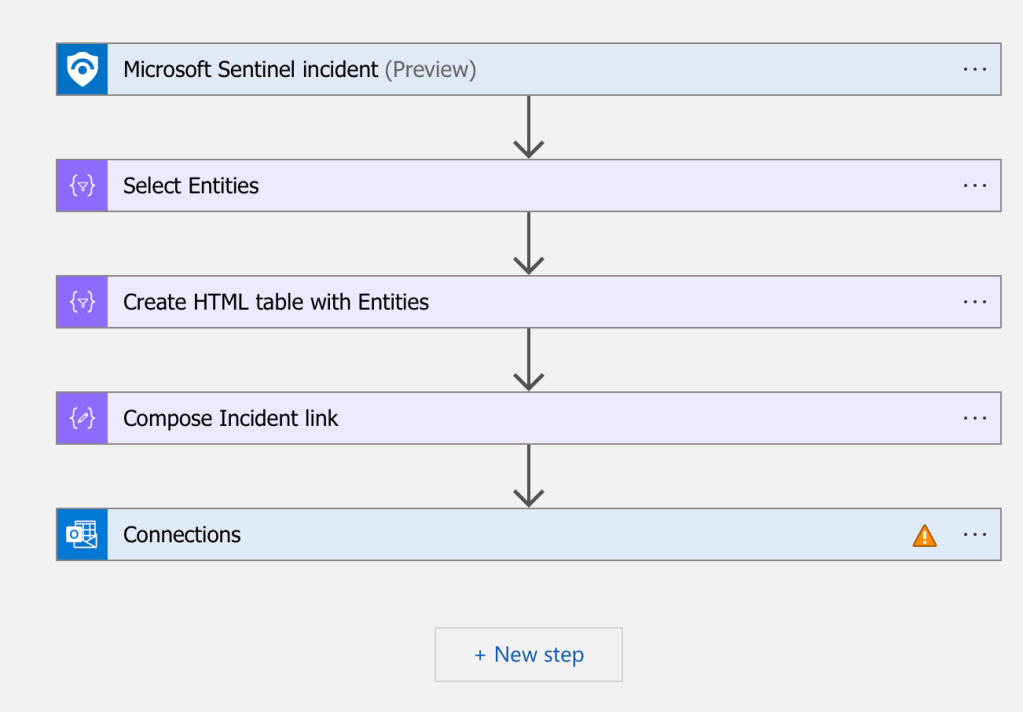
Next, you’ll be directed to the Logic Apps designer. Here, we need to set up the mailbox that will dispatch the email notifications. To do this, click on ‘Connections’.
Select, ‘Add new’.

Now sign in with the mail account that you would like to send the email notifications.

After signing in you’ll see the default email template, which you can customised as needed. For the moment, we’ll keep the default settings. To proceed, click ‘Save’ located in the top left corner of the Logic Apps designer.

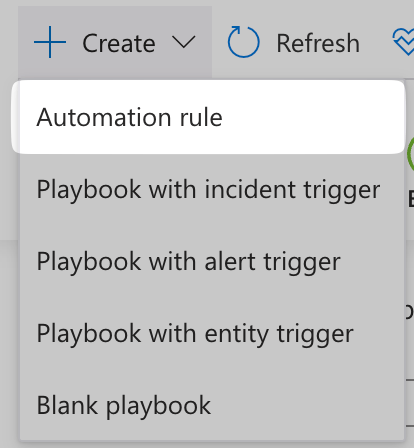
Back in the ‘Automation’ screen, hit ‘Create’ and then select ‘Automation rule’:
Next, assign a name to the Automation; I will use ‘Email on Incident Raised’. Take a moment to review the details on this screen. Under ‘Actions’, opt for ‘Run playbook’, select the ‘Send basic email’ playbook, and then click ‘Apply’.

Our Automation is now active and listed under ‘Automation Rules’, with our email notification playbook operational within ‘Active Playbooks’.


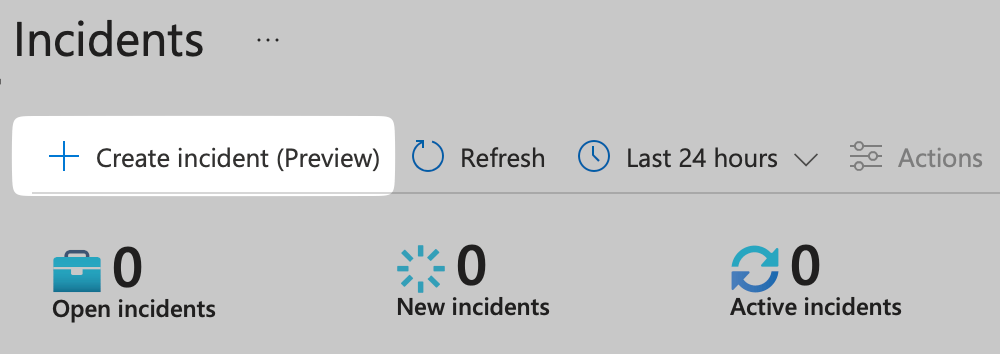
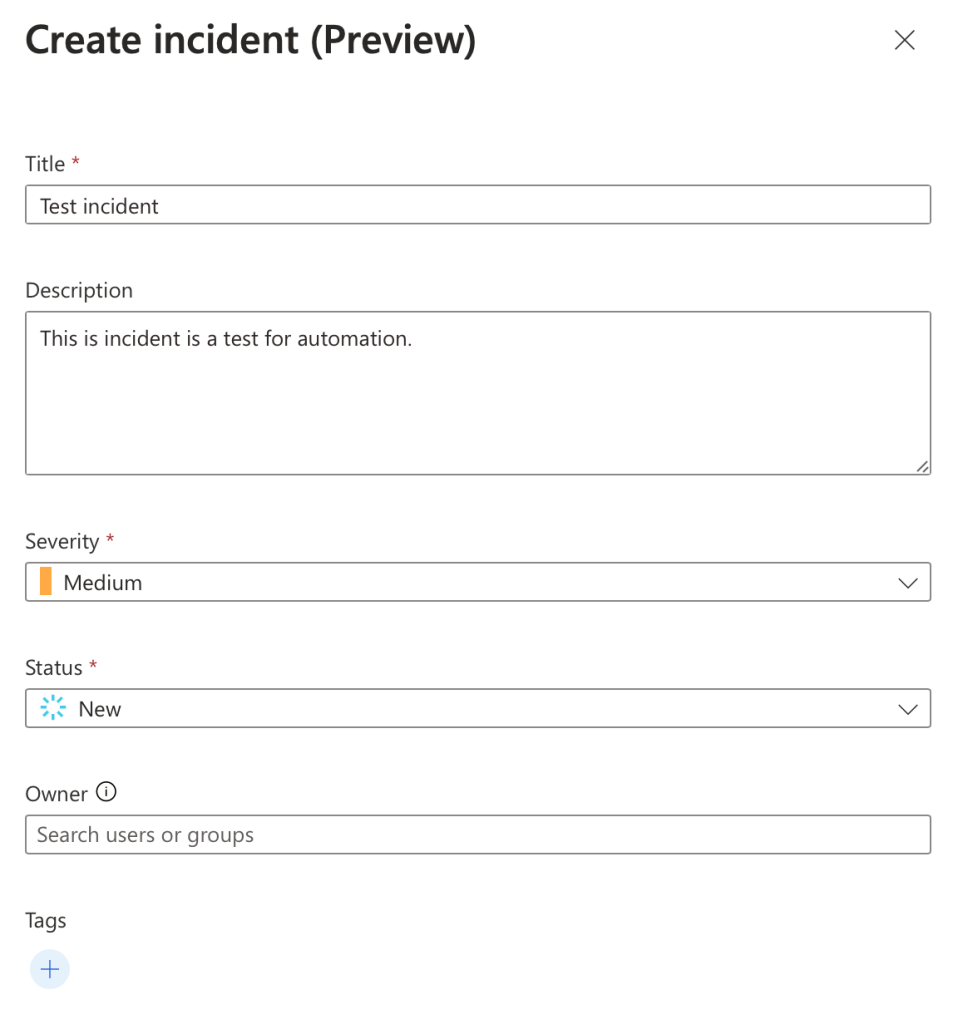
To test our email notification setup, we can initiate an incident to activate the automation. Navigate to ‘Incidents’ and click on ‘Create Incident’.
Please enter the relevant details for the incident in the provided fields and then click on ‘Create’ to proceed.
Please check your recipient’s mailbox, where you should find the test email notification. This email includes detailed information about the incident and contains a direct link to view the incident within Sentinel.

We have now reached the end of our steps on automation and playbooks within Microsoft Sentinel, successfully achieving the objectives we set out at the beginning of this blog.
Debrief
This concludes the post ‘Creating Your First Microsoft Sentinel Instance’.
We successfully established our organisation’s first Microsoft Sentinel instance, beginning with a dedicated Resource Group and a Sentinel workspace.
We integrated Microsoft Entra ID and Azure Activity connectors for thorough security monitoring.
Analytics rules were set for detecting MFA spamming in Entra ID and unusual resource activities in Azure Activity, enhancing threat detection.
Finally, we implemented an automated email alert system for immediate incident notification, ensuring a rapid response to security threats. This setup strengthens our cybersecurity defences and streamlines incident management.
Resources and Next Steps with Microsoft Sentinel
To get started or advance your journey with Microsoft Sentinel, Microsoft’s official documentation is an invaluable resource.
It offers detailed guides and best practices that cater to both beginners and seasoned professionals.
The community forums are also a treasure trove of insights, where you can engage with other users, share experiences, and find solutions to common challenges.
Whether you’re looking to implement Sentinel for the first time or aiming to optimise your current setup, these resources can guide you towards a more secure and resilient cyber security posture, I will place links to the sources below.
Microsoft Sentinel Documentation: Microsoft Sentinel documentation | Microsoft Learn
Microsoft Sentinel Community Hub: Microsoft Sentinel – Microsoft Community Hub
Microsoft Sentinel Blog: Microsoft Sentinel Blog – Microsoft Community Hub
I’m eager to hear your thoughts on the blog post and would greatly value your feedback. Feel free to connect with me on LinkedIn or drop me an email – you’ll find the links to both at the top and bottom of this page 🙂
Interested in staying updated with my latest releases? Don’t miss my future blog posts. Subscribe by entering your email in the box below, and stay tuned for every new update!
Thank you for spending a part of your day here. I hope you find your journey into Microsoft Sentinel as rewarding as I have.
Stay Sentinel,
Ryan

Leave a comment